.
.
Students who complete this lab will demonstrate that they can:
Your instructor may choose to divide you into programming teams of two. One approach for working in such teams is
called Pair Programming.
If you work in a team, only one computer will be used. Each member of the team will take turns typing, but both team members will constantly be thinking. Be sure to include both of your names in a comment at the beginning of every file you work on together. At the end of lab, you will share the completed files.
Programs are developed using a development environment such as Eclipse, Visual Studio, or Netbeans. You develop Processing programs, called sketches, using the Processing development environment.
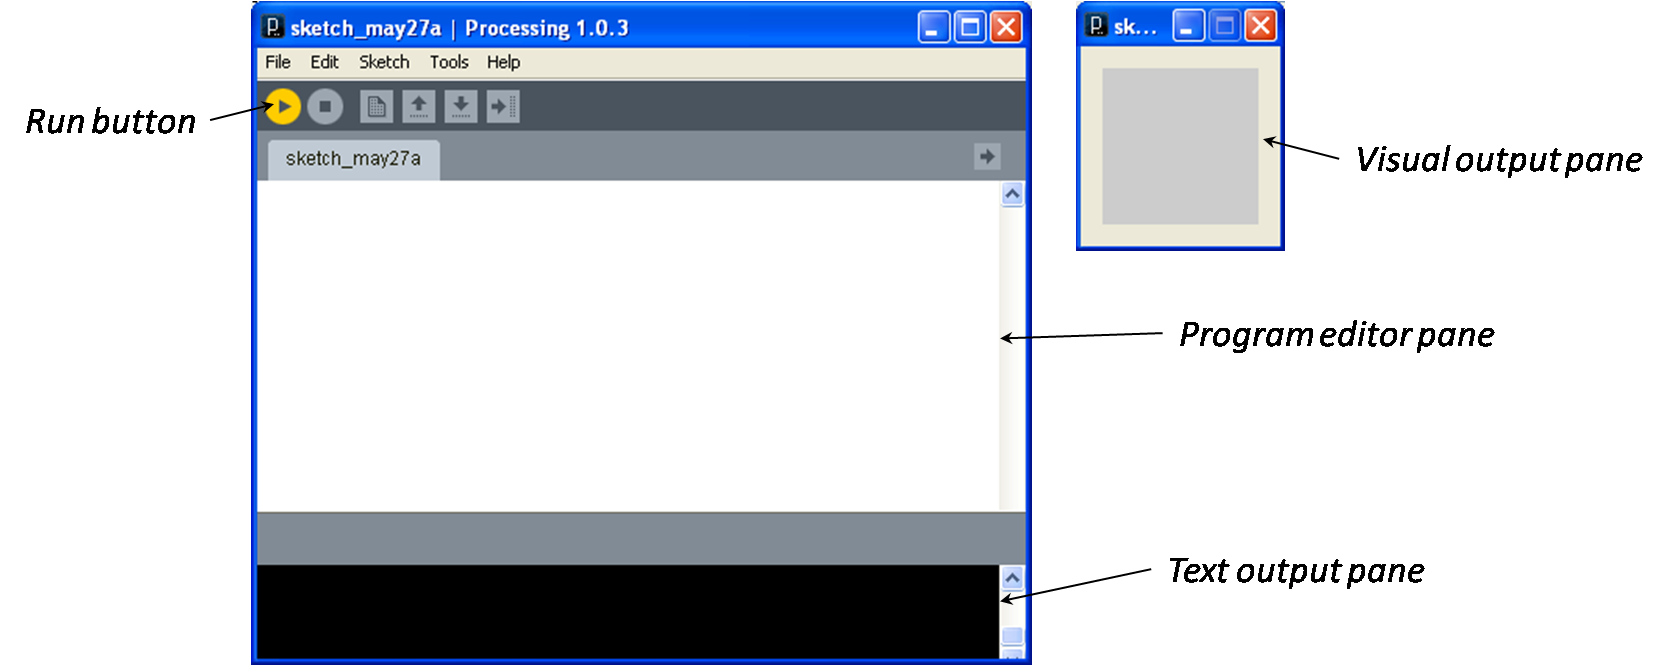
You write program instructions in the program editor pane, press the run button, and Processing displays a new window showing your visual output. Text output, if there is any, is shown below the text output pane. As one would expect, this empty program produces an empty visual output pane and no text output.
Processing.org provides a reference for the Processing IDE .
.
You can find a description of all of Processing’s methods and how to use them in the Processing reference
documentation, see: Processing API.
cs108
directory called
lab02
. Each of the exercises below indicates the name the sketch created should be saved with, and each sketch should be
saved in this new directory.
|
Begin by saving a sketch in your
Use a sequence of figure drawing method calls When you are finished, be sure to save the completed version of your code. |
 |
|
Save a new copy of your smiley face from exercise 2.1 using “File”->“Save As...” and give
it the new name
Modify this new copy of your smiley face to include color, attributes and additional figures as appropriate. Note the oblong eyes, smooth curves, reflection dots in each eye, the curved smiley mouth (the dimples are optional!), and the use of color. Again, you need not copy the face exactly, but try to follow the example sketch as a guide.
For more shape methods, see the Processing reference manual (http://processing.org/reference/ |
 |
|
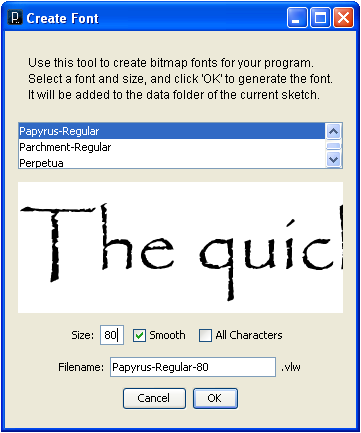
Processing can create, load and render text fonts, but it does not create them automatically. You need to create the fonts ahead of time using the “Create Font” tool. This tool, shown here, allows you to select the font face (e.g., “Papyrus”), its weight (e.g., “Regular”) and its size (e.g., “80” points).
Processing automatically creates the font definition files and stores them in a
|
|
|
Save a new copy of your smiley face from exercise 2.2 and give it the new name
Add a text annotation to your new smiley face sketch, such as the one shown here. You may choose the font face, the font size and the message. You will probably need to resize your canvas to accomodate your message. For this exercise, feel free to modify the face as you see fit. Just be sure to include geometric elements, text and appropriate documentation. |
 |
We will grade this exercise according to the following criteria:
Note the following:
These notes hold true for both labs and homeworks.
If you’re working on a lab computer, don’t forget to log off of your machine when you are finished!