In this lab, we'll work with Microsoft's Internet Information Server (IIS). As with many Microsoft products, it has the reputation of having a well-developed user interface, but also of being unreliable and insecure. We won't render a judgment as to whether this reputation is deserved or not, but will, rather, use the tool in a careful and secure way as possible. It integrates well with ASP.Net, which will be useful to us.
We'll work individually today, and try to communicate over the network with each other's machines.
Getting Started
IIS is a process that runs on a server computer, listening to port 80 for requests that use the hypertext transfer protocol (HTTP). It is pre-installed on Windows 2003 Server, and can be manually installed on other Windows OSs.
To work with IIS, start up the Internet Information Services Manager, found under Start-Programs-AdministrativeTools. This management console allows you to configure and control IIS on your server. When it start up, you'll see something like this:
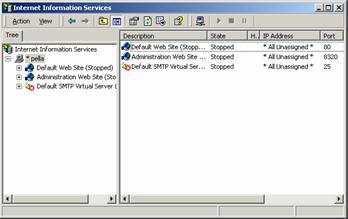
You can see that this console allows you to manage a default web site, an administration web site, and an email server (SMTP). We'll focus on the default web site. At this point, your default web server should be "stopped". Verify that this is, indeed, the case by starting up IE/Netscape/Mozilla and requesting the URL http://localhost/ (the default URL for your local machine). You should get a "cannot find server" error page.
Turn all the services off (if they are on), and leave them off. Putting IIS on-line before you've configured it properly is asking for trouble.
Setting Up the Virtual Directories
Click on the "Default Web Site" in the left pane. This will display all the physical and virtual directories that your IIS server recognizes. You'll find that these directories roughly correspond to the directories that you find in C:/inetpub/wwwroot, the default IIS home directory. Use the Windows Explorer to find this directory and verify that this is so.
As we discussed in class, there is a distinction between the physical directory structure of the machine and the virtual or logical directory structure presented by the Web server to internet clients. IIS also distinguishes a third category, "applications", which are virtual directories with settings that allow server-side executable programs.
Set up a virtual directory on your system, and place some sample HTML page (e.g., the one with client-side code that you built in lab 8). You can do this by clicking mouse right on the default web server, and choosing New-VirtualDirectory. This brings up a wizard that will walk you through the creation process. For the physical directory that corresponds to the IIS virtual directory, you can select any directory on the machine to which you have access (e.g., My Documents/test). You then copy your sample HTML file into this directory - IIS will show it when you open your virtual directory in the management console. You may have to set the permissions on the new files you create to allow read access to the internet user.
Web Site Property Settings
Configuring a web site with IIS is primarily a matter of going through the IIS manager and setting the appropriate properties. To do this, click mouse right on the default web site again and choose Properties. This gives you access a large number of tabbed panes of property settings. Without changing anything, take a look at some of the panes. You can see, for example, that the IP address is set to (All Unassigned), which means that these settings are for the current machine's default web site (i.e., localhost). If you ever have any questions about what a setting is for, you can click the Help button.
As you are looking through the settings, use the Help to determine the answers to the following questions:
- What is the TCP port that IIS is currently using? (see the current tabbed page - Web Site)
- What is bandwidth and process throttling? (see Performance)
- What is the default home directory set to? (see Home Directory)
- What are the default documents set to? (see Documents) Do you know what these are for?
When you have answered the questions given here, close the properties dialog box. You can also set properties for your new virtual directory. Do this by clicking mouse right on the virtual directory and choosing Properties. This list of properties looks like the global one for the default web site, but is specifically targeted to your new directory. Verify that the physical directory is what you want it to be, and ensure that the Read and the Log visits options are chosen (and none of the others). This will allow clients to read your page, but not anything else. Exit the properties dialog box.
IIS Security
IIS is known to have security problems. This reputation is deserved and is primarily caused by a couple of facts: (1) there are legions of anti-Microsoft hackers out there that would like nothing better than to stick it to Bill Gates and Microsoft; and (2) Microsoft products tend to focus more on added features and ease of use than on security. The same can't be said of Linux and Apache, which tend to have fewer enemies and focus on limited features, lower usability, and tighter code.
This being said, it is possible to run a tight ship with IIS, so long as you keep a few things in mind. Here are some general security ideas, along with the concrete steps you should take for this lab:
- Because new security holes are discovered frequently, you should
check for security updates for both IIS and Windows
frequently.
- You don't need to do this for the lab, but if you needed to, you could go to Microsoft's security update site. You can also sign up for email notification of security updates and even configure your Windows 2003 server to automatically install them on your site.
- Disable or remove all unused features, extensions, and
permissions - e.g., disable remote editing/debugging, delete
the sample files, disable unused or buggy server extensions,
and remove write permissions.
- You're already ensured that your site grants only read access and that all visits are logged (see above).
- The Frontpage extensions are notoriously insecure, so you should definitely remove them if you aren't using them. Do this by clicking mouse-right on the default web server and choosing All Tasks-Remove Extensions.
- Enable logging and check the logs frequently for unusual
activity.
- Check the logs by using Notepad to read the log files. The files are located in the directory specified in the default web site's Web Site properties page under General Properties. You'll see that the log entries indicate the IP address that made the request. So far only your machine should be listed in there. Note that you can determine your machines IP address by choosing Start-Run, saying cmd.exe, and then typing ipconfig at the command prompt.
- Microsoft provides a tool called the Microsoft Baseline Security Analyzer that can help secure your systems. We'll work with this system in Project #9.
Unfortunately, the focus of this course doesn't allow us much more time to work with security issues. We'll rest on the relative security provided by the CS and Calvin firewalls.
Accessing the Servers
Now that we've configured IIS, we start serving up pages. Go to the main IIS management console and start the default web server (by clicking mouse-right on it and selecting start). This will cause IIS to start monitoring port 80 and responding the HTTP requests that it receives.
As a first test, load your test page into your browser using the URL http://localhost/your-virtual-directory-name/your-page-name. The page should look the same as it does when you load it directly into the browser as we did last week (take a look at the page source to see the actual HTML code that is being served up). This will verify that the server is passing the client-side scripts on to your browser client for processing. Note that with this configuration, your machine is acting as both the server and the client. The server is the IIS you just started, and the client is your browser.
Now, we'll verify that your IIS installation is serving up pages for other machines in the lab. Share your full computer name with a couple of other classmates. You should be able to load their pages and they should be able to load yours.
When some others have accessed your web page, check back to your log to verify that there are log entries for their visits.
Checking In
When you are finished, have each team member submit the URL of their page in KV.
Back to the top
