In this lab, we'll unify the web forms you've built in previous labs into a single Movies website. We'll then set up Windows security to allow public access to some pages and login authentication for a secure page.
Plan the Website
The lab website will work something like this:
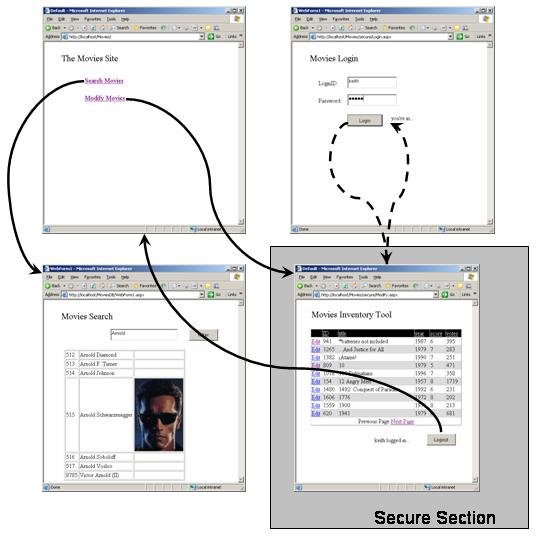
This navigation map includes the following pages:
- Welcome Page - We will build a new welcome page (see the upper left on the navigation map). It will be open to the public.
- Search Page - We built this search page (on the bottom left of the map) as part of Lab #11 and will import it into this new website. This will also be open to the public.
- Inventory Page - We build this inventory update page as part of Lab #12 and will simply import it as well. This page will be open only to users with valid login accounts.
- Login Page - We will build a new login page (see the upper right of the map), similar to the one you built in Project #11. We'll configure the security settings to redirect users to this page automatically when they try to access the inventory page.
Prepare the Database
In order to support the new login page, add a customers table to your Movies Database. The new table should include the following fields:
- loginid - varchar 50
- password - varchar 50
When the table is build, add one user, hard-coding the loginID and password. Make sure that you don't add extra spaces in the database or it will mess you up when you do the login check.
Create the Public Application
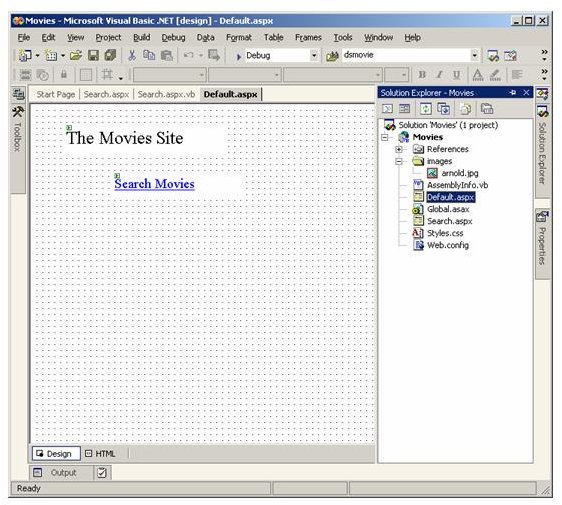
In order to simplify the structure of the Movies website, we'll create a single web application/folder in which to save all the web forms. Start VS.Net and create a new ASP.Net project, storing in some new location under a new name (e.g., "Movies"). The VS.Net workspace should look something like this:
Build this application as follows:
Copy the "Movies Search" webform from Lab #11 into this project as follows:
Import your existing movies search webform by clicking mouse-right on your application name in the "Solution Explorer", choosing "Add"-"Add Existing Item", and then inserting the aspx file for your search webform (you may have to view "all files, *.*" to see this file).
Create an images subdirectory and insert a copy of the Arnold Schwarzenegger image as you did in Lab #11.
- Build and run your imported webform. Note a
couple of things about this process:
- You may have to change the first line of your movie search aspx file (in the VS.Net HTML view) to refer to the name of your new integrated application rather than the old one.
- You may have to rename the old webform to something like Search.aspx. You can't name everything "Default.aspx" or "WebForm1.aspx".
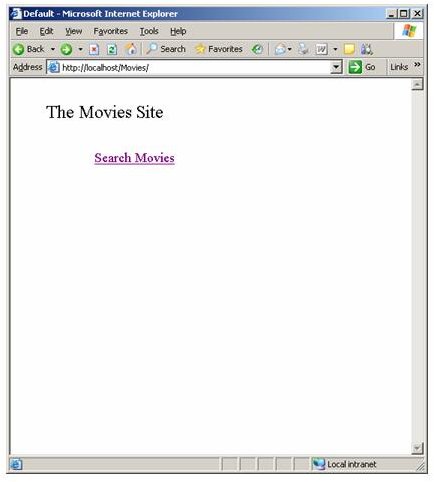
Create a new welcome webform named "Default.aspx", and add a simple hyperlink to the search page you just imported. Do this by adding a "Hyperlink" and setting its "NavigationURL" to the name of your search page. The new page should look something like this:
Rebuild your application and make sure that it works before moving on.
Create the Embedded Secure Application
Now, create a new VS.Net project (e.g., named "Secure") in a sub-folder within the public web application folder you just made in the previous section (e.g., in http://localhost/Movies/secure). We will configure the security for this application in the next section. For now, build it as another public application as follows
Copy the movies inventory webform here in the same manner in which you copied the movies search webform into to the public application. In doing this, note the following:
- As you did last time, insert the aspx file of the main webform in as a "New Item".
- The Inventory webform used a DataSet, so you will also have to insert the DataSet's xsd and vb files using "Add"-"Existing Item".
- Build and run your new secure application. Again, you may need to modify references to the old application name in order to get the system to rebuild properly; The VS.Net compiler will flag these errors for you.
Create a new login page similar to the one you built for Project #11. It should authenticate the user against the Customer table you added above. The webform should look something like this:
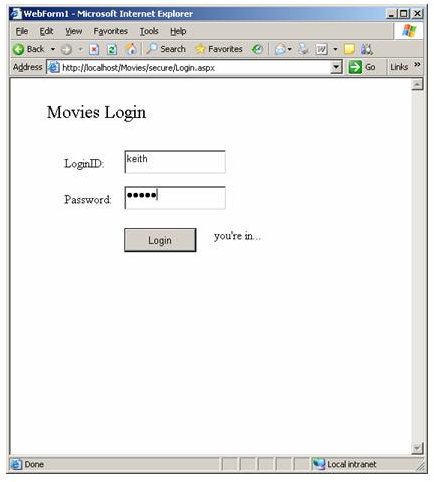
Copy the DataReader code for this webform, either from your solution to Project #11 or from what you used for the movies search webform in Lab #11.
For now, just have a text box label that says "you're in" if the login works. Test this login page in your browser before moving on.
- Add a hyperlink to your welcome page to hyperlink to the imported inventory page. Note that you don't link in the login page, we'll configure ASP.Net to do that automatically later.
Rebuild your application and make sure that it works before moving on. You should be able to visit the welcome page and then access either the movies search or the movies inventory pages without any login prompts or other impediments.
Configure ASP.Net Security
When you have your VS/ASP.Net applications set up, you can configure IIS to implement authentication. The most appropriate form for this application is forms authentication (see the discussion in the class notes for more details on this). To configure forms authentication, do the following:
Modify the web.config file in your secure application as follows:
Tell ASP.Net to use forms authentication as follows:
<authentication mode="Forms">
   <forms loginUrl="YourLoginFileName.aspx" />
</authentication>
The comments in the web.config file indicate where to make this change.
Tell ASP.Net to deny access to all other users as follows:
<authorization>
   <deny users="?" />
</authorization>
Again, the comments in the web.config file indicate where to make this change.
Modify the code for your login page to send the user on to the page they wanted, provided that their loginID and password are valid. Do this by replacing the "You're in" message in your "Login" button event handler with the following code:
If (the login process works out) Then
    System.Web.Security.FormsAuthentication.RedirectFromLoginPage(the users loginid, False)
End If
Before going on, verify that your website redirects users to your login page before allowing them to access the movies inventory page. Note that the user will never directly request your login page. Rather, anytime an unauthorized users requests an .aspx file in your secure directory, ASP.Net will automatically send to them login page first before allowing them in.
ASP.Net forms authentication will allow the user to remain logged in for a default amount of time (as specified in the web.config file). When this time is up, they will automatically be logged out; you may have seen this behavior in the class grading database if you leave a session sitting around long enough. You can also allow your users/customers to manually log out. Do this by including a "logout" button on your inventory page and programming its event hander function as follows:
System.Web.Security.FormsAuthentication.SignOut() 'Logs the customer out
Response.Redirect("your non-secure main page") 'Sends them back to the main welcome page
Re-run the application to make sure that the security settings work properly. How would you determine if ASP.Net has actually logged you out?
Using the Session Variable
In the class lecture notes, we discussed the importance of saving state information throughout a user session. Although the movies application doesn't have much of a practical reason to do this, we can at least experiment with the feature. Do this as follows:
Add the following code in the appropriate part of the "Login" button event handler:
Session("loginID") = the user's loginid 'Set a session variable to the login IDThis will store the user's loginID in the session state.
Add the following code to the beginning of your "Logout" button event handler:
Session.Remove("loginid") 'Removes the session variable.Now that you've saved the user's loginID in a session variable, you can access this variable on any webform in the application. As an example, modify your movies inventory page to print out the user's login ID, as shown in the following sample:
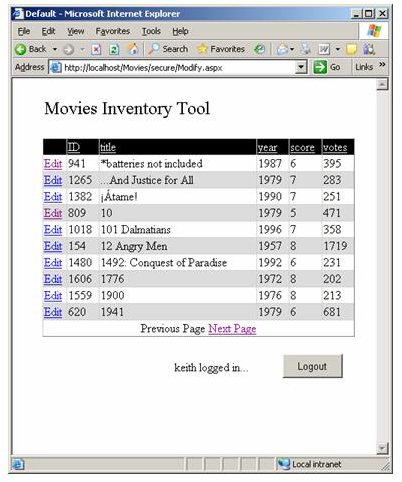
Note the "Keith logged in..." message at the bottom. We used View State (i.e., ViewState()) to do something like this in Lab #12. Could we do this again here? Would it be a good idea?
When you have it all working, make sure that someone else in the lab can work with your new site and access the secure pages.
Checking In
When you're finished, use KV to submit the URL of your new movies application along with a valid loginID and password that I can use to access your site.
Back to the top

