4. Installing CDT in Eclipse 3.3
The fourth step is to install CDT, the C++ plugin for Eclipse.
-
If it is not already running, launch Eclipse.
Choose a workspace, and if necessary, close the
"Introduction to Eclipse" window that appears the
first time your run Eclipse.
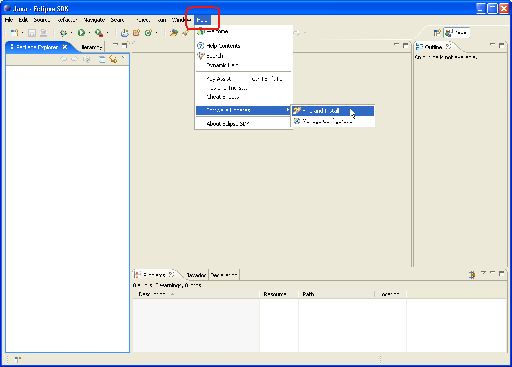
Then select Help->Software Updates->Find and Install...:
-
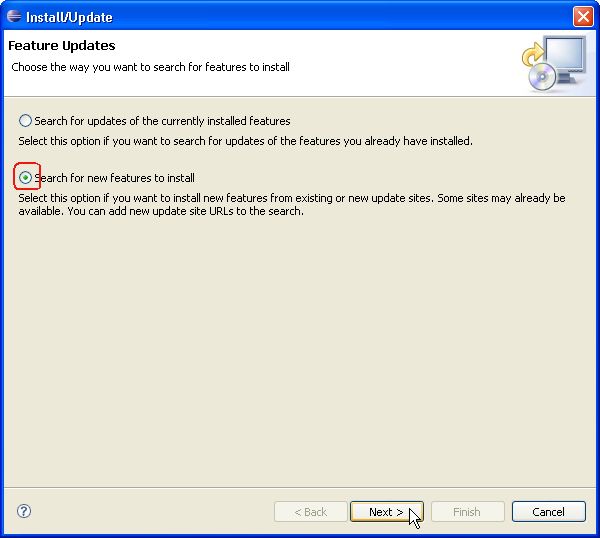
A dialog box will appear allowing you to specify features to be updated.
Select the "Search for new features to install" radio button;
then click the Next button:
-
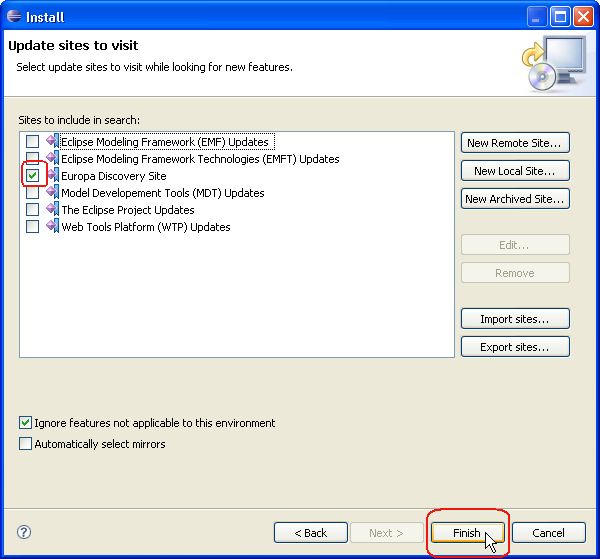
A dialog box will appear displaying update sites to visit.
Select the "Europa Discovery Site" check box;
then click the Finish button:
-
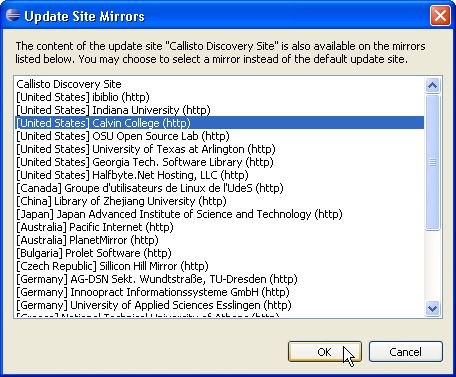
A dialog box will appear allowing you to select the server
from which to download CDT.
If you are on-campus at Calvin, select the mirror.calvin.edu;
otherwise, select the server that is geographically nearest you;
then click the OK button:
-
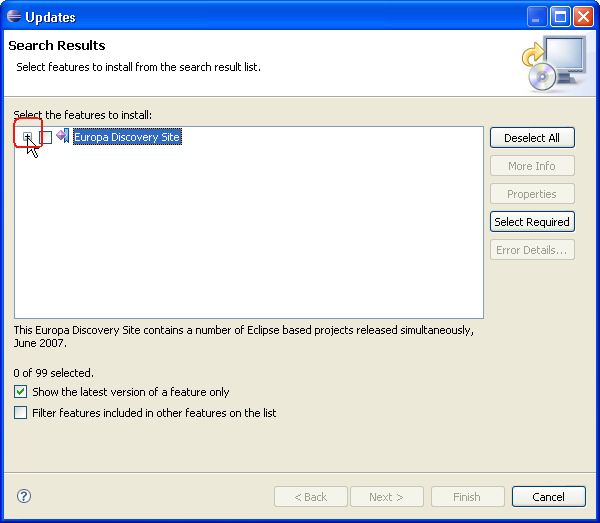
In the next dialog box, click the + next to
"Europa Discovery site to reveal the packages available there.
-
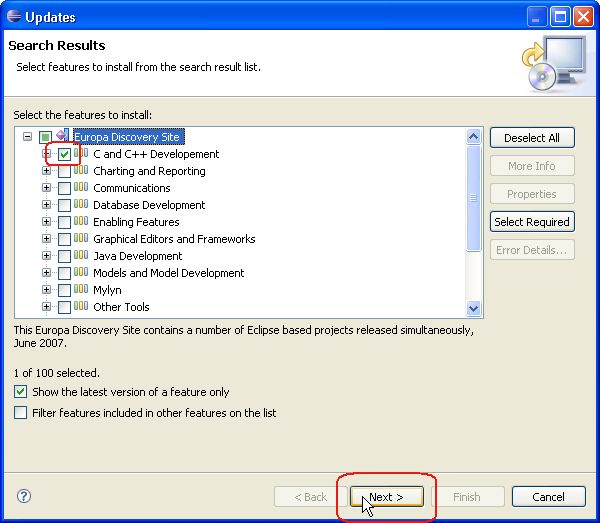
Click the C and C++ Development checkbox;
then click the Next button:
-
The next dialog box displays the licensing agreement.
Read it carefully; then select the
I accept the terms... radio button;
and click the Next button:

-
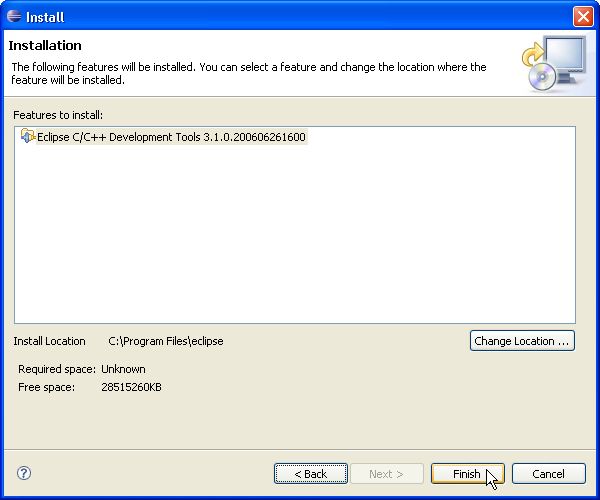
The next dialog box is the last one.
Click the Finish button and wait for the installation to finish.
(Better yet, read your Data Structures textbook while you wait.)
-
At some point during the install, Eclipse will ask you to verify that
you want to install these components.
Tell Eclipse that you do indeed want to install them.
-
After the installation, Eclipse will ask you if you want to restart your
workspace.
Click the Yes button, and Eclipse will restart itself.
-
Congratulations!
You've just installed CDT!
By default, Eclipse starts up in the Java perspective.
However, you should now be able to create
C or C++ projects in Eclipse, just like we do
in lab,
which will cause Eclipse to change to the C/C++ perspective.
If you want to tidy up your desktop, you can safely discard any/all
of the files and folders we downloaded to your Desktop during these steps.
Have fun!
This page maintained by
Joel Adams.