On many platforms, there should be an icon for you to double-click to start up Eclipse. If you're using Linux without an Eclipse icon, enter this at a command-line prompt:
unix-%eclipse
Either way, you'll be prompted to specify a workspace directory;
use a folder that is out of the way of other programs. I would
recommend something like
/home/jdfrens/Eclipse/workspace (my personal
preference) or
/home/jdfrens/courses/cpsc185/workspace. You won't be
able to use these folders themselves, so change whatever parts make
the most sense (e.g., jdfrens should be replaced with
your own user name; cpsc185 should be replaced with
the id given to the course at your institution).
You'll have to start Eclipse this way every time you sit down to program. There's a checkbox you can check so that Eclipse does not continually ask you for your workspace directory; if you didn't check it this time, you can check it the next time you start Eclipse.
Warning: Eclipse is very particular about its workspaces. Never move or remove projects from a workspace folder unless you use Eclipse itself to do this. Many students try to move a workspace to a new location without Eclipse's help; really bad things will happen if you do this.
The Eclipse Platform will start up with a variety of windows like so:
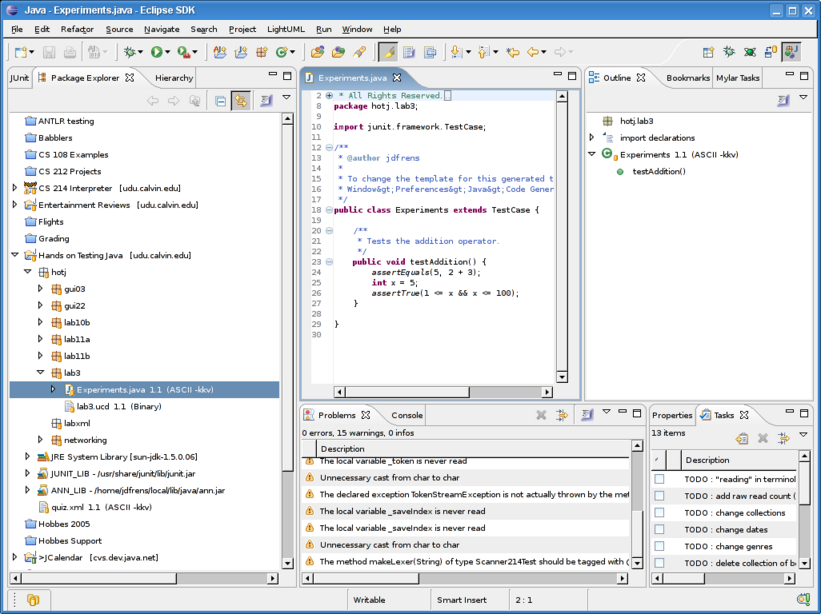
This is a picture of a rather active Eclipse user.
Experiments loaded in right now. The
Outline window on the right displays the
Experiments class in an outline form.Do this...
Make sure you can find the Package Explorer window, the editor, the
Problems, and the Console windows.
In order to configure your project properly, you first have to configure Eclipse. You should have to go through these steps just once.
First, you need to create one classpath variables. The classpath is a list of directories and files where the Java compiler and JVM can find various libraries. You need to tell Eclipse where to find the support code for this lab manual (and the textbook).
Setting Classpath Variables
This is the classpath variable you need to define:
|
Name |
Path |
|---|---|
|
|
|
Do this...
Define this classpath variables.
You won't have to do this again (unless there's another library you need for another project).
Eclipse uses projects to keep different software projects separate. For your purposes, think of everything you do for this lab manual as one project. Java itself provides other ways to keep each lab exercise separate, so using one Eclipse project for all of the exercises in this lab manual makes a lot of sense.
Here's the process to create a project:
Creating a project
Hands on Testing Java for
the Project name; and hit
Next>. The other values in this dialog window
should be fine.ANN_LIB, and JUnit
3.8.1.Do this...
Create your Hands on Testing Java project using the instructions
above.
You should now see a "Hands on Testing Java" in the Package Explorer on the left side of the Eclipse. Expand the project by clicking on the triangle to the left of its folder icon. You'll see a JRE ("Java Runtime Environment") entry as well as the classpath variables.
You should have to create only this one project for this lab manual. Your instructor might ask you to create other projects for other work that you do; follow these same steps, changing names as appropriate.
Now you can create a file to type in your answers to the questions in the lab.
First, it's best if you have a folder to store all of these questions. Here's how you will do it:
Creating a folder in a project
You actually need two folders, one for prelab questions and another one for exercise questions.
Do this...
Follow the directions to create two folders, Exercise
Questions and Prelab
Questions.
Now text files can be created in these folders for you to write your answers in.
Creating a text file
.txt suffix.Do this...
Create a text file in the Exercise
Questions named lab01.txt. Type in the
answers to all of the questions you've already accumulated for this
lab.
You should also do the prelab questions.
Do this...
Create a text file in the Prelab
Questions named prelab01.txt. Type in
the answers to the prelab questions.
classpath, Console, Editor, Outline, Package Explorer, Problems, project