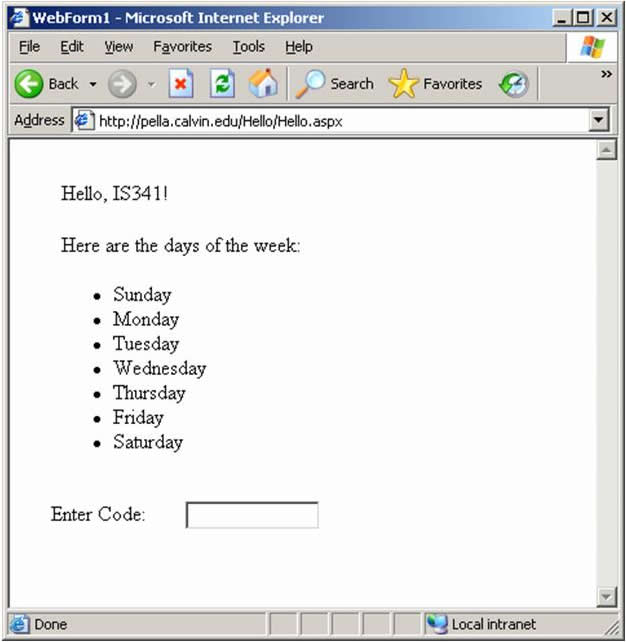
In this lab, we'll work with VB/ASP.Net web applications that incorporate both client-side and server-side processing. We'll build a page that looks something like this:
Building ASP.Net Applications in Visual Studio
In this section, we'll create a simple ASP.Net web site using Visual Studio.Net. This will be similar to the "Hello, World" application we discussed in class. Do the following things:
Start up Visual Studio and create a new VB.Net-ASP.Net web application. Call your application Hello, and place it in some virtual directory (e.g., localhost/Hello).
Rename the main web page (currently named WebForm1.aspx) Hello.aspx
Add two Web Form text label objects on the page (from the Web Form tool box on the left). Set the text property of the first (probably named label1) to some message you want to deliver to the class (e.g., "Hello, IS341!"). Leave the second one (label2) blank, we'll load text into it using VB code.
Add code to load the text field with the names of the days of the week in order (i.e., "Sunday, Monday, ..."). To create VB.Net code to do this, double-click on the second label field. This brings up the "backing code" file, and automatically puts your cursor into the page_load() function, which is automatically called by the ASP.Net application processor when creating the page. Use a VB.Net loop (from 0 to 6), a counter of type DayOfWeek, and the toString() function to do this, and remember that you can add text to a label using the following commands:
Label2.Text = "a value for the first line of the label field"

Label2.Text += "an additional line of HTML code"
Label2.Text += "yet another line of HTML code..."
Save this web site, "build" the project and get it to serve up the page properly using a browser running on your web server.
Modify your output to display the list of day names as an HTML unordered list.
When you've done this, make sure that you can do the following:
- Display someone else's page on your browser.
- Determine whether the VB.Net code you wrote executes on the server or on the client.
- Find the source files for the project on the server computer's file system (e.g., the .aspx file, the backing VB code file, and the compiled VB binary code).
- What happens when you load the .aspx file directly in your browser, rather than through your localhost? Why is this?
Using the VS.Net Debugger
Visual Studio.Net provides a pretty nice environment for developing and debugging .Net applications. The compiler will catch syntax errors when you build the application, listing them at the bottom of the IDE screen. Just double-click on them to find the source of the error.
VS.Net also provides a pretty nice debugger. If your server is configured properly, you can set break points in your code (by clicking on the gray bar to the left of the code and pressing the Start-debug button.
Be sure that you can do these things now, even if you didn't need them in the hello world application.
Using ASP.Net Event Handlers
ASP.Net supports a number event handlers. These are functions that the system automatically calls in response to interface events such as button pushing events, form load events, etc. To play with this, we'll create a text input box and a "check" button. When the user clicks the button, a "button-pushed" event will be called, which will check the value in the text box and print out a message of some sort. To implement this, do the following:
Add a Web Forms TextBox, a Button and a Label to your Hello page. Note the names that are given to these objects; you'll find them in each object's property list.
Set the default text of the button to "check" and to blank for the textbox and label.
To create code to be executed when the button is pushed, double-click on the button object. This will bring up the backing VB code file and take you to the button-pushed event handler. This feature of Visual Studio allows you to easily jump from the ASP code to the backing code.
Add an (VB) statement to the hander that takes the value of the textbox (NameOfTextBox.Text) and sets the value of the label field to something like the following:
You have entered: ValueInTextBox.
With this mechanism, you can specify any code you'd like to execute when the "check" button is pressed.
Using ASP.Net Validators
One common function that you might like to perform on ASP.Net forms is input validation. This is so common, in fact, that ASP.Net includes predefined Field Validators to perform this sort of processing. For this exercise, add two validators, one to check that some value has been entered into the textbox, and another to check that the value is some predefined pass code (e.g., "secret"). Do this as follows:
To check that some value has been entered in the textbox, add a RequiredFieldValidator object to the form, just below the label you included above. Set the "Error Message" for this field to something like "Please enter a passcode" and set the ControlToValidate to the name of the textbox object.
To check that the value in the textbox is set to a secret code, add a CompareValidator object to the form as well, over the top of the RequiredFieldValidator you just made. Set its error message and controltovalidate appropriately, and set its ValueToCompare to your secret passcode.
Save and build the application, and make sure that it works the way you expect it to.
When you have the page running properly, consider the possibility of implementing a login page with a password using either this validator approach or the event handler approach from the previous section. Which one do you think would be most secure? For a hint, check and see what HTML code gets sent to the client for each of the approaches. Check also to see if the javascript library we discussed in class (i.e., WebUIValidation.js) is included in this HTML code. Do you remember what it's there for?
Checking In
Submit the URL of your page in KV along with the answers to the questions in the last section.
Back to the top
