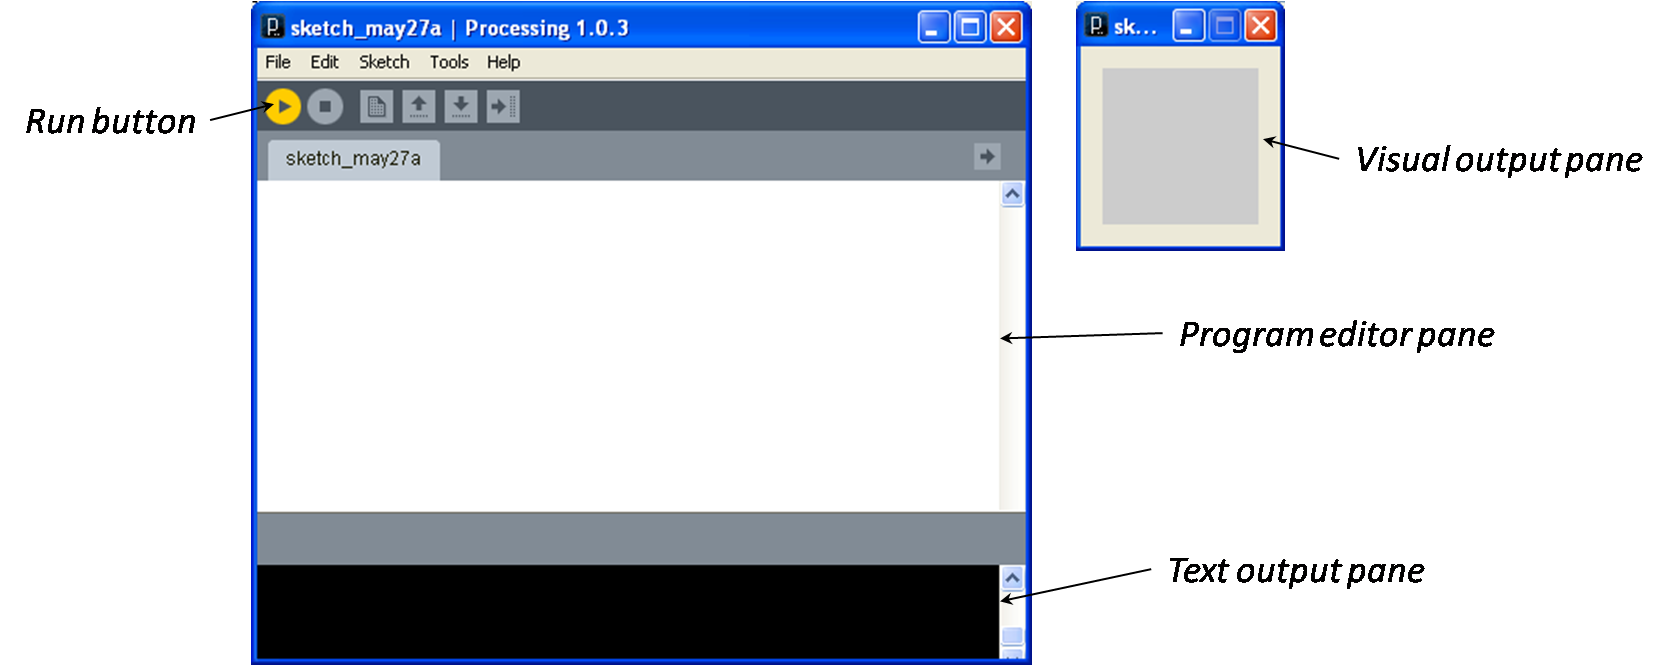
Programs are often developed using a development environment. You can develop Processing programs using the Processing development environment.
You write program instructions in the program editor pane, press the run button, and Processing displays a new window showing your visual output. The graphical output window is made up of tiny squares of colored light, called pixels, arranged in a grid. Text output, if there is any, is shown below the text output pane. As one would expect, this empty program produces an empty visual output pane and no text output.
You create a program by typing commands into the program editor pane.
Thus, we need to understand how to enter commands (which, for our
purposes, will be refered to as a "method calls"). The basic syntax
for a method call is:
The name of the method, followed by an open parenthesis, followed by a comma separated list of arguments, followed by a close parenthesis, followed by a semicolon.
For example, we can call a method called "size" as follows:
size(300, 400);
This causes the size of the graphical
output window to be 300 pixels wide, and 400 pixels high. Every time you call a method you
need to understand what arguments are required, and in which order
they must appear. Each language you work with will have reference
documentation that explains how to call the built-in methods. You can find a
description of all of Processing’s methods and how to use them
in the Processing reference documentation, see: Processing API
size method.
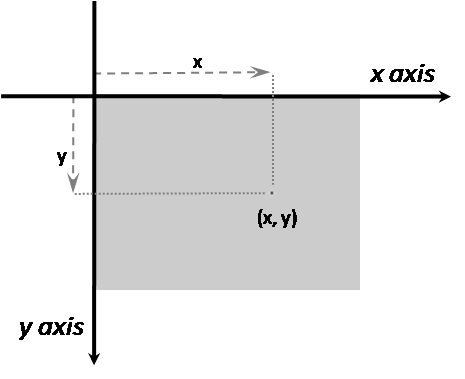
Each pixel in the output pane is described with a pair of x and y coordinates. However, in the output pane, the pixel in the upper-left corner is considered to be at location (0,0), with the x axis increasing horizontally to the right, and the y axis increasing in a downward direction.
In addition to program commands that Processing will execute, it is
often helpful to have explanations of the code as part of the file.
These explanations, which are ignored by the programming language are
called comments. Comments are indicated by prepending the line with a double slash like so:
// This is a comment which will be ignored
Ideally,
there will be comments throughout your code that indicate what is
being accomplished. At the very least, the first line of any program
you write should be a comment indicating that you are the author of the program.
size(300, 300);
rect(50, 70, 100, 200);
ellipse in the upper right
corner of the output window. You will need to look at the documentation for the ellipse
method to determine what arguments it requires, and in which order.
Begin by saving a sketch on your H: drive with the name
Smiley.
Add documentation to the top of the program editing pane that indicates your name.
Use a sequence of figure drawing method calls to create a smiley face similar to the one shown here. Use a 200x200 pixel canvas. You don’t need to match the example sketch exactly, but try to include all the elements as shown.
When you are finished, be sure to save the completed version of your code.

If you have extra time, you may experiment with color. To change the inside color of a shape, you can use the
fill
method (see the documentation). The three arguments are the amount of
red, green and blue light from which you wish to create a
color. The amounts are specified on a scale from 0 to 255, where 0
indicates no light, and 255 indicates all of the light. Thus, to specify the color green you could use the command
fill(0,255,0);
As an additional challenge, update your code to produce the picture below:

You will find the method arc()
useful. Note that Processing draws circles in a clockwise direction,
where PI/2 is at the bottom of of the circle, and 3*PI/2 is at the top.
When you have completed your coding, save your work, and submit your code via Moodle. PLEASE NOTE: The file you should submit will be named "Smiley.pde", and it will be found on your H: drive in a folder called "Smiley".
We will grade this exercise according to the following criteria: