Programs are developed using a development environment such as Eclipse, Visual Studio, or Netbeans. You develop Processing programs, called sketches, using the Processing development environment.
Processing.org provides a reference for the Processing IDE .
.
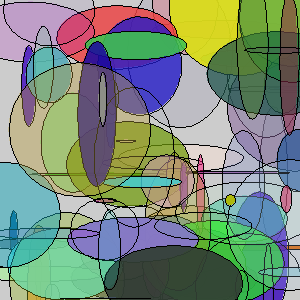
Processing can generate graphical animations as shown in this example program.
|
|
void setup() {
  size(300, 300);
}

void draw() {
  fill(random(255), random(255), random(255), random(255));
  ellipse(random(300), random(300), random(150), random(150));
}
|
Note the following features of this program:
.pde
extension). setup(), which Processing calls once at the very
beginning to set the size of the output panel, and draw(), which Processing calls
repeatedly to specify what to do on each step (frame) of the animation.size(width, height) - This method is called
in the setup() method and sets the size of the output window in pixels (i.e., points of light on
the screen) using this statement with different values for width and
height. Here, the statement creates an output panel that is 300
pixels by 300 pixels.fill(redIntensityValue, greenIntensityValue,
blueIntensityValue, transparencyLevel) - This method sets the
color of the next figure to the specified mixture of red, green and blue light intensities. The
intensity values range from 0 (black) to 255 (white).ellipse(centerXCoordinate, centerYCoordinate,
ellipseWidth, ellipseHeight) - This method draws an ellipse at the
specified location and size. The values are specified in pixels.random(maximumValue)
method to compute random numbers between 0 and maximumValue.One good way to learn programming is to experiment (or shall we say play) with existing programs.
Start by copying the code given above into the Processing IDE, saving it in as Raindrops
on your H: drive and running it. NOTE: When you save your program Processing will automatically
create both a folder and file. The folder will be called "Raindrops" and will contain a file called "Raindrops.pde"
Make sure your program runs correctly before continuing.
Now, make
modifications to the program to achieve the following goals:
rect() method).You can find a description of all of Processing’s methods and how to use them in the
Processing reference documentation, see: Processing
API.
For this exercise, you will be uploading your completed Raindrops.pde file to Moodle.
Be sure to save your working program before you upload it to Moodle!
Processing can load and render images as shown in this example program.
|
size(270, 270);
background(0);
image(loadImage("blueMarble.gif"),10,10);
|
In addition to features we have seen before, this program also uses new features:
background(grayscaleColorValue)
- This function sets the background color specified by
grayscaleColorValue, whose
values range from 0 (black) to 255 (white).image(loadImage(filename),
xCoordinate,
yCoordinate) - This statement uses
two functions: the first, loadImage(), loads
the image stored in filename
and the second, image(), displays the loaded
image on the output screen at the position specified by
coordinates (xCoordinate,
yCoordinate).
Make the following modifications to the example ”earth” program given above:
FunWithImages.