Welcome to CS 112! In this first lab exercise, we will introduce the Eclipse integrated development environment, and see how we can use it to write a C++ program. The exercise assumes that a C++ compiler (e.g., GNU's gcc/g++), the make utility, Eclipse, and CDT (the C++ plugin for Eclipse) have all been installed on your system.
This lab tells you how to use Eclipse in the CS Dept's Unix Lab (SB 354), which is currently using Ubuntu Linux. If you have not used Linux before, you may want to work through this Introductory Exercise.
I would recommend that you bookmark this Linux Quick Reference, so that you can locate it quickly in the future. Your instructor will conduct a quick introduction to using the Linux command-line. These are useful skills to practice, as they will allow you to login to a remote system (e.g., from home) and work with your files remotely.
There are different ways to launch the Eclipse IDE, but for now, just do this:
eclipse(If that doesn't work for some reason, try entering /usr/bin/eclipse instead.)
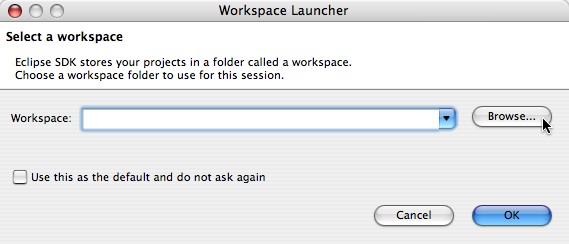
Eclipse likes to store all of the program files you generate in a single folder called your workspace. So when you launch Eclipse, it will ask you what folder you want to use for your workspace:
Click the browse button, and a file-dialog box will appear by which you can navigate to the folder you wish to use as your workspace. If you have already created a 112 folder, navigate to that folder, select it, and click Ok. If you have not yet created a 112 folder, use the Create Folder button to create one named 112, select it, and click Ok.
Make certain that you do not use spaces in the names of any files or folders you create. Spaces within the names of files or folders can confuse Eclipse.
Once you click the Ok button, Eclipse will launch. The first time you launch Eclipse, it will display a cover page asking you if you want an introduction to Eclipse. This can be useful, but much of the material is Java-specific, so for now, just close this cover page. This will expose a window like the one below:
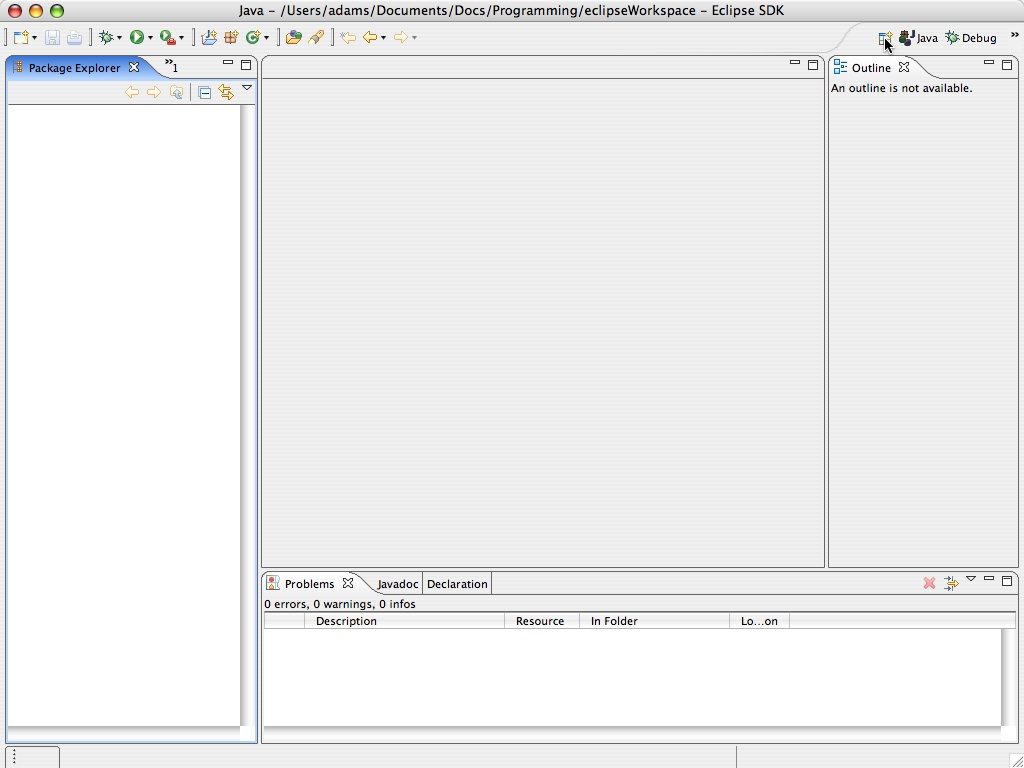
Note that Eclipse divides its screen into several regions, including:
The particular arrangement of the screen is determined by what Eclipse calls a perspective. By default, Eclipse launches the Java perspective (for building Java programs), so our next task is to switch from the Java perspective to the C++ pespective.
There are two ways to change Eclipse's perspective:
 .
Clicking this button will display a mini-menu of perspectives.
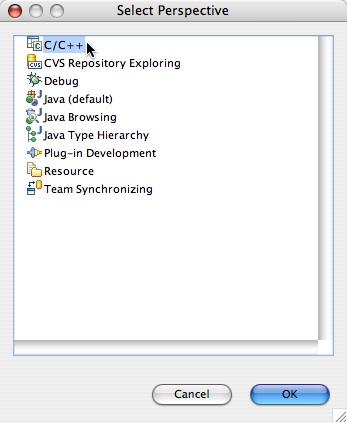
Selecting Other from this mini-menu will display the
Select Perspective dialog shown above.
If CDT is installed on your system, you should see C/C++
in the list of available perspectives, so select it and click Ok.
.
Clicking this button will display a mini-menu of perspectives.
Selecting Other from this mini-menu will display the
Select Perspective dialog shown above.
If CDT is installed on your system, you should see C/C++
in the list of available perspectives, so select it and click Ok.
Once you have selected the C/C++ perspective, Eclipse will update its appearance something like that shown below:
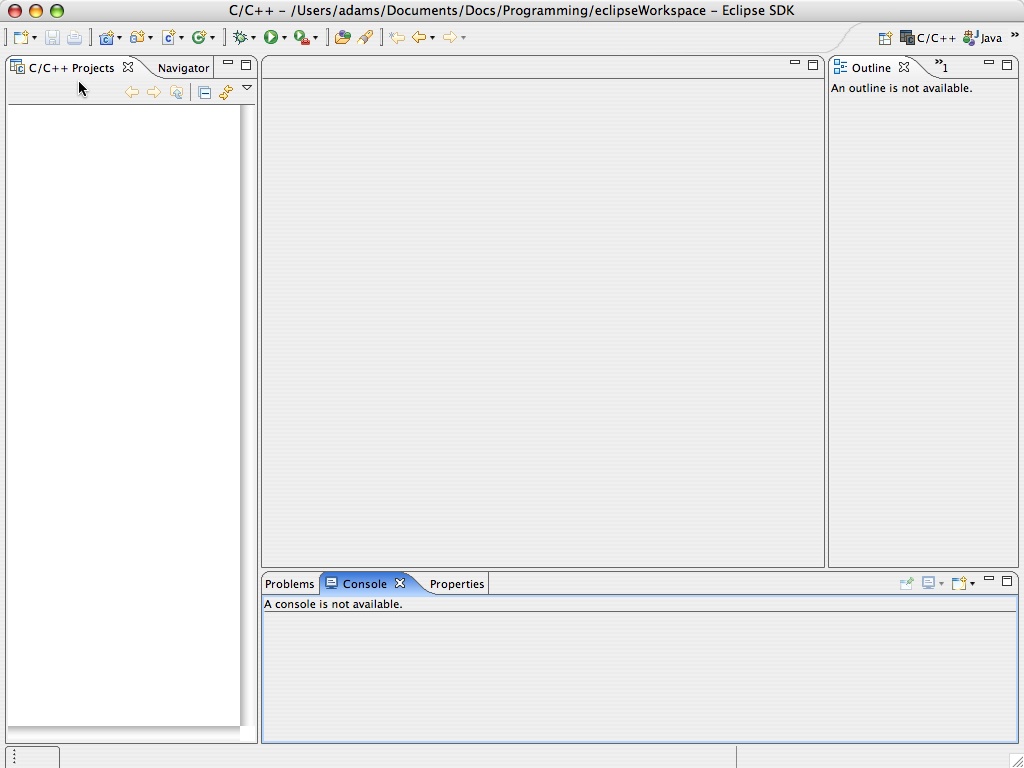
Note that the C/C++ perspective keeps the same basic areas as the Java perspective, though some of the labels have new names.
Congratulations! Eclipse is now ready for C++ programming!
The preceding steps were all "first time using Eclipse" steps -- it should not be necessary to do them again. In fact, if you were to quit Eclipse right now, and then relaunch it, it should come back looking just the way you left it. (Feel free to try this if you like.)
The remaining steps are ones you will want to remember, as you will need to do them for each lab and assignment in CS 112.
Like many IDEs, Eclipse organizes the files for a given application by storing them all in a project folder. So to start a new application/program, the first thing you need to do is create a new project. One way to do so is to use Eclipse's File menu and select File > New > C/C++ Project.
When you do so, Eclipse displays a New C/C++ Project dialog. Choose C++ Managed Build and then Next. In the resulting dialog, you can enter a name for your project folder. Type lab0 for its name (remember no spaces), and then click the Finish button. If Eclipse asks you if you want to switch to the C++ Perspective, click "Yes". Eclipse then generates a new folder in your workspace named lab0, in which it will store the files we create in this exercise. This folder then appears in the Project Explorer area on the IDE's left side.
C++ programs are stored in one or more source files, so to create a program in Eclipse, we must create at least one source file. To do so, we again use the File menu and choose File > New > Source File. This will display a New Source File dialog, in which you can enter the name of the file. Enter the name main.cpp and click the Finish button. You should then see main.cpp appear in your IDE's Project area, and your editing area should now contain a main.cpp tab. This is the area in which you can type and save a program.
Now that we have a file in which to store a program, we are ready to enter the program. Copy the following program into the main.cpp editing area:
 /* main.cpp
  * Student name:
  * Date:
  * Author: Prof. Victor Norman
  * For: CS 112, Lab 0 at Calvin University.
  */

#include <iostream>
#include <string>
using namespace std;

int main() {
        cout << "Welcome to CS112!" << endl;
        return 0;
}
Be sure to customize the Student name: and Date: fields with your name and today's date.
Once you have made this change to your project properties, you can save your program various ways:
 ).
).When Eclipse compiles your program, the results of the compilation will appear in the Console area at the bottom of your IDE. If all is well, you should see something like this at the end:
   g++ -o lab0 ./main.o
   Finished building target: lab0

   Build complete for project lab0
If you see instead see a message like this:
   make: *** [main.o] Error 1
   make: Target `all' not remade because of errors.
   Build complete for project lab0
then your program contains one or more errors. (You may have to scroll up to see the error message.) Eclipse will display a red X-sign like this:
The compiler creates a binary executable version of your program.
If your program has compiled successfully, you can run this
binary executable version by clicking the Run button,
which is a green circle containing a white triangle like this:
 .
When you click this button,
you should see the output from your program appear
in Eclipse's Console area at the bottom of your IDE.
.
When you click this button,
you should see the output from your program appear
in Eclipse's Console area at the bottom of your IDE.
If for some reason this does not work, try right-clicking in the main.cpp window and choosing
Run as > Local C/C++ Applicationfrom the context menu. If your program is free of errors, that should work. (If that doesn't work, get your professor to take a look.)
When your program builds and runs successfully, congratulations! You have compiled and run your first C++ program in Eclipse!
To run your program again, you can use the same
Run button:
.
(FYI: When you have multiple projects,
you can switch between them by clicking the downward-arrow
next to the Run button.)
Change main, so that it now prints out Welcome to CS112 and C++, your name here!,
using the variable. To do this, use multiple << operators, similar to this:
cout << "Welcome" << aVariable << endl;
int courseNumber() {
  return 112;
}
Then, create a Header File called utils.h and in there put this code:
int courseNumber();
In your main.cpp file, add #include "utils.h" to the area where you have
#include <iostream>.
Now, in your code in main, instead of hard-coding 112 in your output, call the function courseNumber to get the course number. Compile your project, fix any problems the compiler finds, and run your project.
NOTE: you do not have to turn in anything for this lab.
To quit Eclipse, you can choose File > Exit or just click the "close box" on Eclipse's window. Eclipse will save its current state, so that when you start it next time, it will be all set for you!
Be sure to logout from your workstation, so that no one plays any pranks with your account!