The purpose of today's lab is to explore how to write Graphical User Interfaces (GUIs) using Python and TKinter. We will also explore test-driven development.
The reading guide provided basic documentation on Tkinter and the lab will provide code snippets, but if you are looking for additional documentation a good starting point is available on the Python site: https://docs.python.org/3.4/library/tkinter.html
Begin by making a new package for today's lab named lab11.
In some cases, the best way to specify the actions of an object is to give a set of test cases that a completed implementation should pass. A software development cycle that begins with a test, and then writes an implementation to pass the tests is considered test driven development. As additional functionality is determined necessary, first, a new test is developed, and then the development work commences.
We will explore this software cycle (very briefly) by developing a model of a simple calculator.
Begin by copying (or downloading) the following modules:
Take a minute to review the contents of these files and note the following:
Your job is to reimplement the calculate() method so
that all of the tests pass. Note that you should not change the unit
tests, only the calculator class.
When all of the tests pass, we have a functional method in our Calculator class that we can use to do some calculations. Let’s add a graphical user interface to let a user do calculations using this calculator.
When beginning a graphical application, it is usually a good idea to sketch out what the interface will look like, so you have an idea of where you are heading. Today, let's head for something like this:
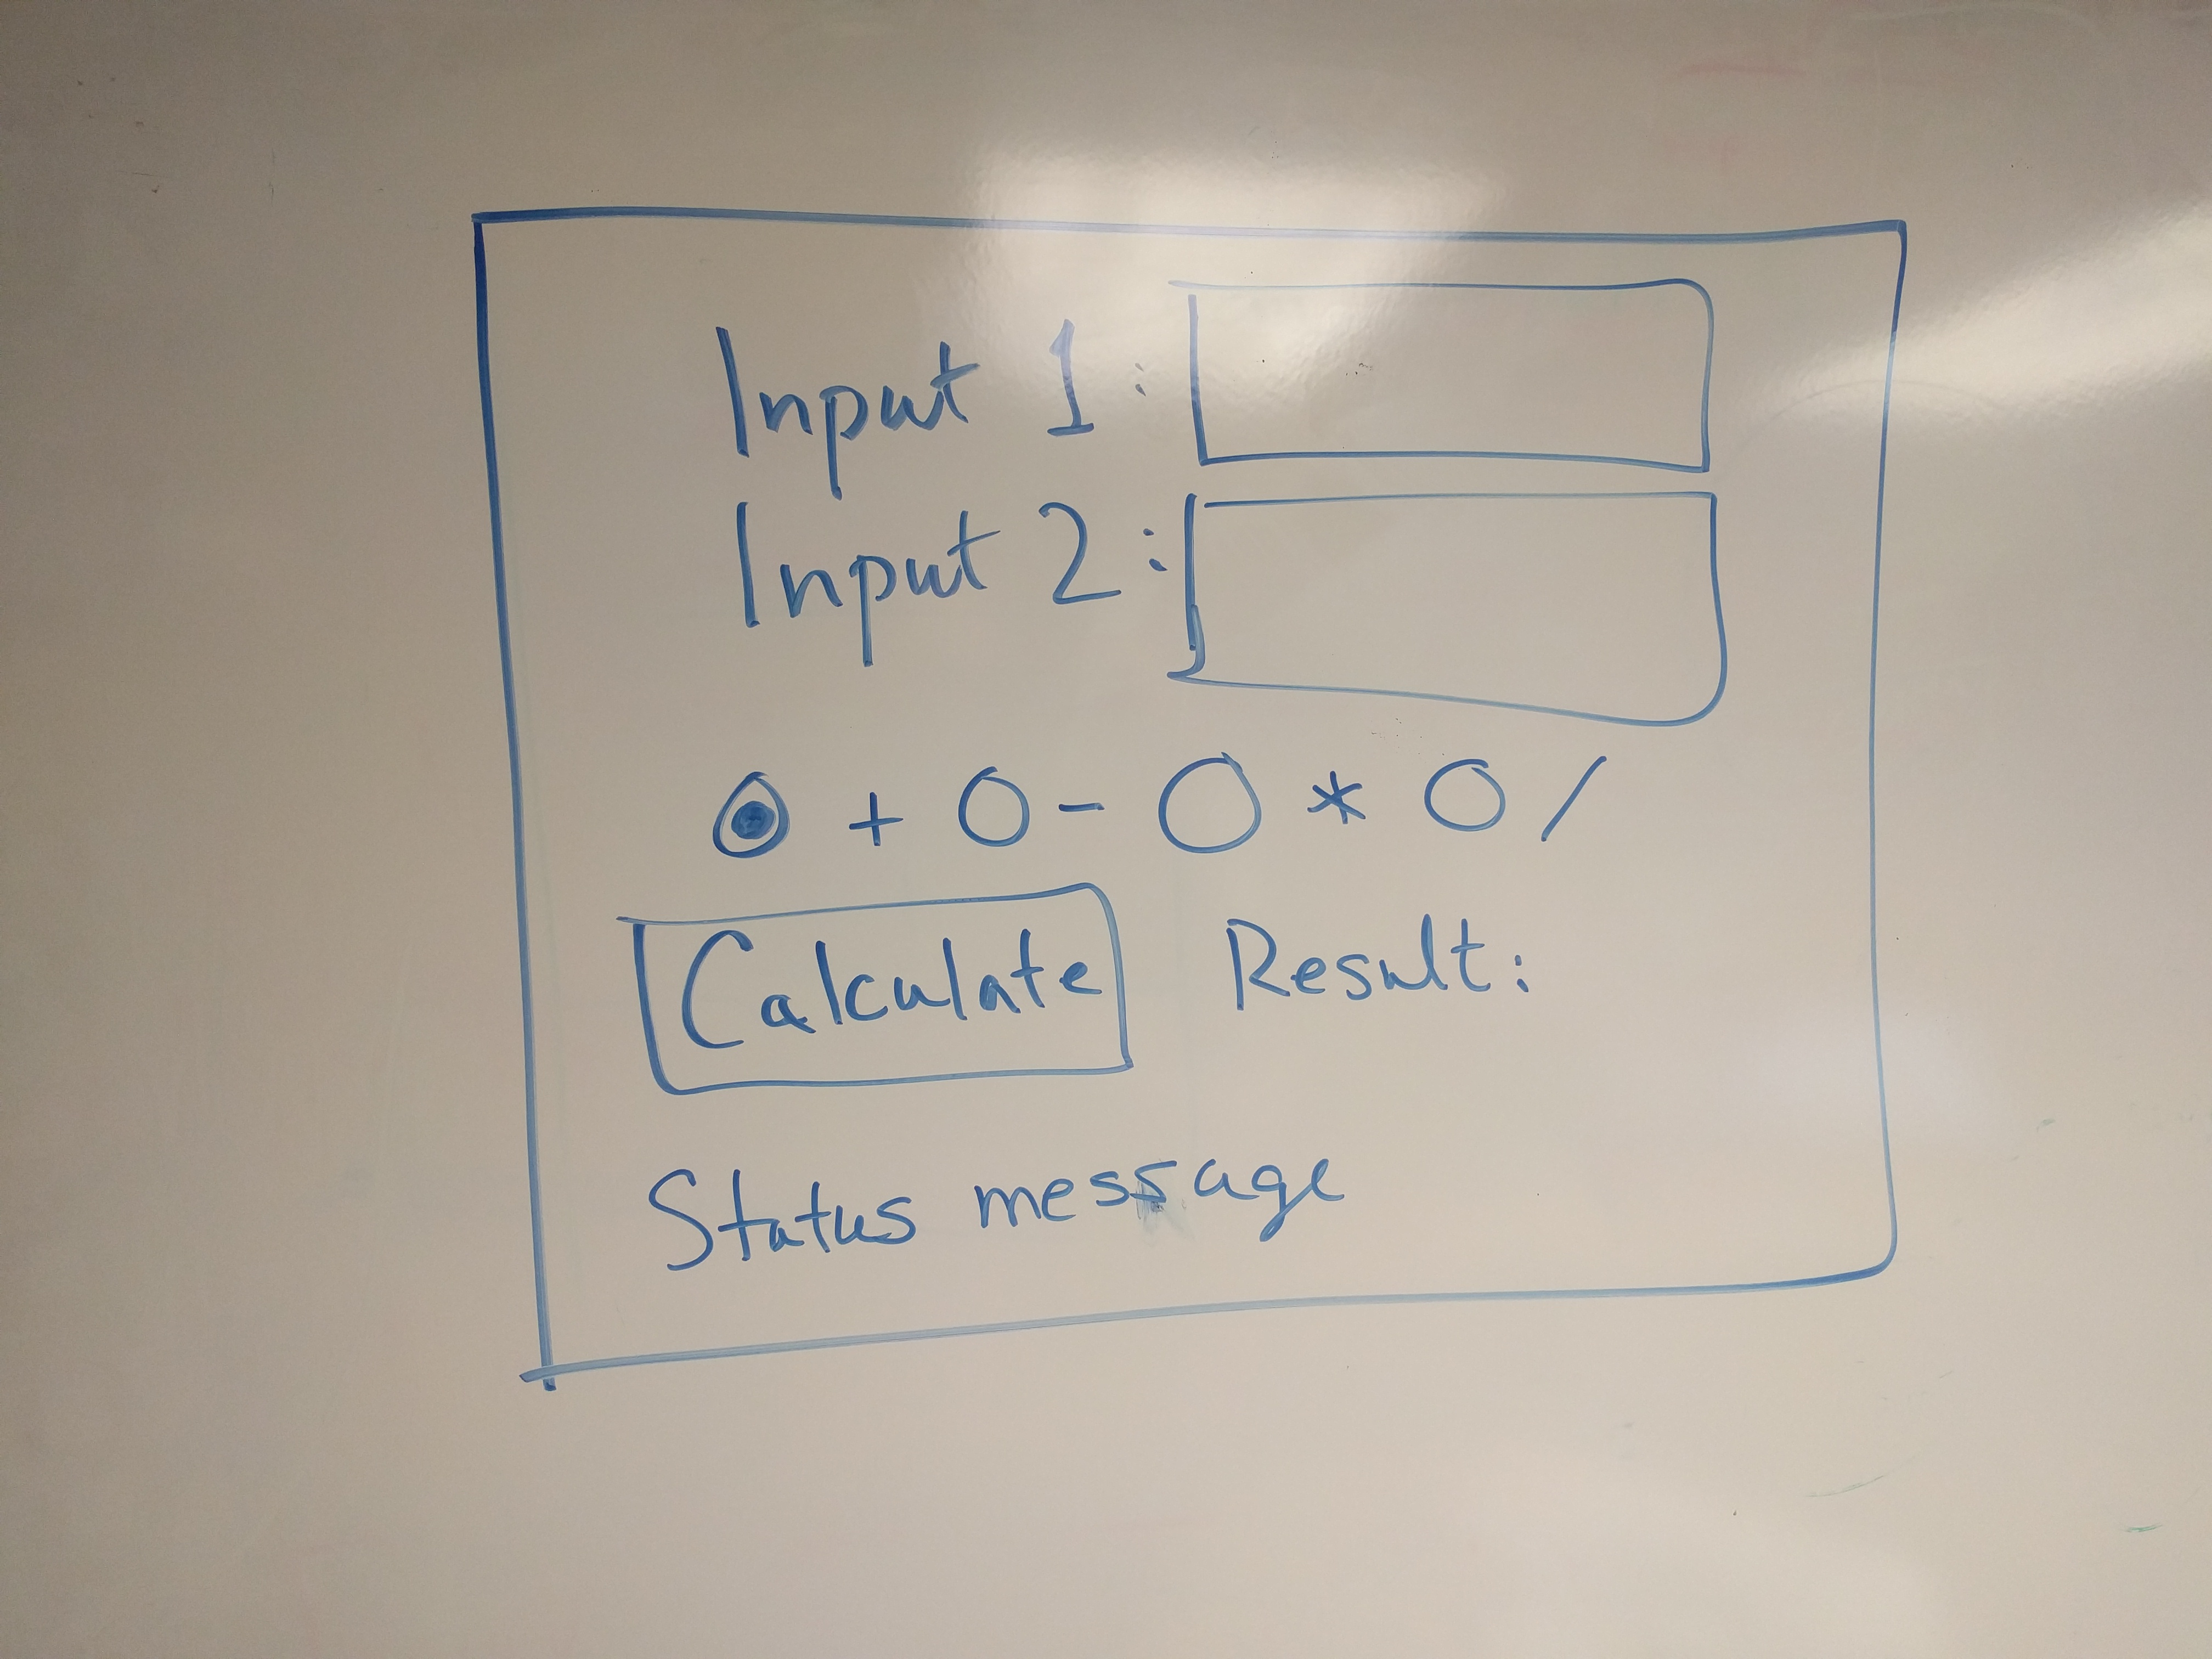
Notice that this mockup (a photograph of a hand-sketch) draws the elements of the GUI informally and doesn’t spend time making it look perfect. The labels are simple text, the buttons are boxes with text and the entry fields are empty boxes. We just want a general idea of where things will end up so we have a reference.
Start building the GUI structure from top to bottom as follows:
lab11 package named
guifrom tkinter import * from calculator import *
if __name__ == '__main__':
    root = Tk()
    root.title('Calculator')
    app = Gui(root)
    root.mainloop()
This creates the GUI application class, names it “Calculator” and starts the user event loop.
Gui and add a constructor
that receives a window object from its calling program
and then creates and places widgets on that window as specified by
this algorithm:
self._calc = Calculator()
This object will perform all the calculations for the GUI interface.
input1_label = Label(window, text="Input 1:")
input1_label.grid(row=0, column=0, sticky=E)
input1_entry = Entry(window, width=6)
input1_entry.grid(row=0, column=1, sticky=W)
This much should build the first two “lines” of the GUI structure. There are no associated commands, but it is a good first iteration. Check that the application works as expected before continuing.
As we consider our next iteration of development (continuing from top to bottom) we realize that radio buttons would be more appropriate for choosing the operation that the buttons we drew in the mockup (because we only ever want to allow one calculation at a time). We will still make it explicit to the user which button has been chosen, but the radio button interface will be a clue to the user that only one will be valid at a time and will prevent them from entering anything other than the legal operators (i.e., +, -, *, /).
Update your constructor to add radio buttons for choosing the operation, and labels to show what the chosen operation is at any time.
We may want to move the buttons around (or reformat them) as a group, so we'll create a substructure and put the operation buttons together there. Do this using the following algorithm:
Frame object to attach to the window:
operator_frame = Frame(window)
operator_frame.grid(row=2, column=0, columnspan=2)
StringVar instance variable called
self._operator that will be shared between all of the
radio button objects. Give this variable a value of '+'
using the set() method.
Button for the addition operation
and attach it to the frame on the left side. You can use this code:
add_button = Radiobutton(operator_frame, text="+", variable=self._operator, value='+')
add_button.pack(side=LEFT)
Run your driver and verify the following:
With our basic layout in place, let's add both the structure and the calculation in our next iteration.
Our goal in this step is to use the calculator that we have carefully tested in Exercise 11.1 to do our calculations. We also want these results to appear on the screen. Our calculator is ready to go (so it will not change!!), but the driver application needs some work. Start with the graphical structure by adding the following steps to the constructor algorithm started above:
StringVar called self._resultself._result,
and put it in the fourth row to the right of its label. You can do
this using this code:
self.result_label = Label(window, textvariable=self._result, width=6)
self.result_label.grid(row=3, column=2, sticky=W)
We are now (finally) ready to actually do something with our interface. In particular, we want to perform the calculation indicated by the text fields and chosen operation when the user presses the Calculate button.
input1_entry. We want
to be able to access the value the user types in this field, so add
a new instance variable called self._input1 which is an
instance of StringVar. Associate this variable with input1_entry
as you did before, by adding the argument textvariable=self._input1
to its constructor.
command=self.do_calculation
do_calculation that
implements the following algorithm:
calculate() method of the self.calc
object to perform the calculation specified by the interface. You
can use this code (if you named your variables as specified
earlier):
result = self._calc.calculate(self._input1.get(), self._operator.get(), self._input2.get())
result.
You can use:self._result.set(result)
Check that your calculator GUI works!
At this point, you should have a functioning calculator — as long as the user correctly enters numbers in the text fields, and never attempts to divide by zero. Of course, we shouldn’t be assuming we have perfect users! We have not specified what should happen if something goes wrong. Let’s remedy this shortcoming.
Using the techniques you have practiced in earlier exercises, add a label to the bottom of the GUI that will indicate if any errors occur. This label should initially welcome the user (e.g. “Come on! Let’s calculate!”) and then be updated if an error occurs to give an indication of what went wrong. If no errors occur during a calculation, the label should remain (or return to) the initial greeting.
NOTE: you should handle the error by "wrapping" your code with a
try: / except: block. The question is: what action causes
the error to be generated? The answer: the call to do_calculation().
So, that is the place where you should handle the error and update
the error message label.
The final optional element of today’s lab is to add a memory component to the calculator.
Update the calculator class to access and change the memory instance variable. You must define an accessor and a mutator. Then, in the calculate method, if either of the operands is the letter “M”, the value in memory should be used. Add init tests that demonstrate the correctness of your implementation.
Over in the GUI, add a new row with a button that allows the user to store the current result into the calculator memory and a label that indicates the current value stored in memory.
Submit all the code and supporting files for the exercises in this lab. We will grade this exercise according to the following criteria:
If you’re working on a lab computer, don’t forget to log off of your machine when you are finished!