In this lab, you will learn how to ...
With with a partner, on one machine. It is often useful to have the lab up on the screen on the other machine.
Thonny is an IDE, an Integrated Development Evnrionment, that can be used for writing, editing, debugging, and running Python code.
Start up Thonny by clicking the Start menu and finding Thonny in the menu. Thonny has been pinned to a tile, or you can search for it using the Search feature.
Take your time to familiarize yourself with the Thonny interface. Through exploration, find out how to enable line numbers on the code; it may come in useful for debugging later on.
All work that we want to save should be saved in our personal home drive, at: S:\
Code saved on the C:\ drive will be wiped out on reboot, so make sure that any files that you create are created in the S:\ drive.
NOTE: If your S:\ drive is NOT available, you may need to log in/out to get it to show up.
S:\ drives are created on first login to the Syslab and Ulab machines, and due to a race condition, may not show up at first login. Log out and back in, or reboot your machine, to make sure you have an S:\ drive before continuing.
Using the File Explorer, create a S:\CS104 directory to save all your lab programming for this course. You may want to create another directory for each lab week, such as S:\CS104\lab1, but this is up to you.
In this section, we will create our first Python file. In Thonny, take your empty workspace, and save it to your S:\, for example, at S:\CS104\lab1\lab1.py.
Type this code into your new lab1.py file.
import sys
print(sys.version)
Click on the green and white triangle/circle combo ![]() in the task bar to run your code.
in the task bar to run your code.
Your code should execute in the "Shell" tab at the bottom of the Thonny window, and the text in it should be similar to this:
3.6.1 (v3.6.1:69c0db5, Mar 21 2017, 17:54:52) [MSC v.1900 32 bit (Intel)]
This is the version of python that you are running. If you do not see 3.6.1 at the beginning, get your professor over so he/she can check it out.
Now, log out and let your partner log in and do all of the above up to this point. Again, your partner needs to save her/his Python files in the correct location on the S:\ drive.
Step 3: Connecting to a Scribbler robotThere are not enough Scribblers for everyone to work alone. You also may/should submit only one copy of your work, with both your names in it.
Whenever you are going to run code that interacts with a Scribbler robot, you have to take steps to associate your desktop machine with your Scribbler (actually, with your Fluke, which is what runs bluetooth, so that it can communciate wirelessly). Do these steps:
Get a Scribbler and Fluke, connect them, and turn the Scribbler on. Note the 4-digit unique identifier of the Fluke. It is on a white label on the Fluke and often says something like 0DFE.
Find the Bluetooth tray item on your screen:
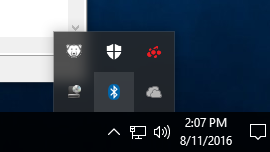
Double-click on it, then Search for Bluetooth devices. Choose your Fluke, which will be called Fluke2-XXXX, where XXXX is your 4-digit Fluke id. Click Next.
After your connect to the Fluke, you'll see a message saying "Setup of COM40 complete". COM40 might be some other com port. Remember what com port has been chosen for you. Click Next.
In your lab1.py file, replace the code with this code:
from myro import *

init("COM40")                   <--- Replace COM40 with whatever com port you are using.
forward(1, 1)
beep(4, 880, 884)
backward(1, 1)
Run your program. A Bluetooth Security dialog box should pop up. Verify that it refers to your Fluke, and click Yes.
You should see this in the Console window:
Myro version 5.0.1 is ready!

You are using fluke firmware 3.0.9

You are using scribbler firmware 1.1.6

Hello, I'm Scribby!
Your scribbler should go forward for one second, beep for 4 seconds, and go backward for a second. Make sure your robot does not go off the table and crash.
Replace your this code in lab1.py with the following:
from myro import *

init("COM40")
print("Done connecting")

# Make the robot draw a circle by making the left wheel
# go forward at speed 0.4, and the right wheel go forward
# at speed 0.75.  Stop the robot after 30 seconds.
print("Issuing motors command")
robot.motors(0.4, 0.75)
print("Doing nothing for 20 seconds")
wait(20)
print("Issuing stop command")
stop()
print("Done")
Put your scribbler on the floor and run your code. When you get it working, get a whiteboard and whiteboard marker and make your scribbler draw the circle on the whiteboard -- NOT ON THE CARPET!lab1.py:# # Lab 1, CS104 # <Your Name and your partner's name, if you have a partner, along with your # user ids> # Example: Student Q. Name (sqn2), Student X. AnotherName (sxa2) # <Date> #
Submit only one copy of your code, for both people in your group. The graders will grade this one copy and enter the grade for each of you into moodle.
To submit your final version of lab1.py, you’ll need to use Windows Explorer.
lab1.py file down in your S:\workspace\CS104\lab1 folder.lab1.py.T:\yourid\.lab1. (Do NOT call it Lab1 or lab 1 or Lab 1 or GodIsGood. Call it lab1.)lab1? If not, give yourself an atomic wedgy, and then rename the folder lab1. Now, put away your Scribbler and Fluke, nicely.