Welcome
Welcome to the Project Connect computer and information
literacy course. In this class, we will work together to set up a
basic personal computer (PC) and then discuss how to administer
and use it properly. With proper training and reference material,
most anyone can learn how to do these things. We'll focus on the
most important things in this 4-session course.
If you attend all of the course sessions, you can take the
computer home at the end. The computers are used, but still good
machines, and there is no cost to you for the computer or the
course. There may, however, be a charge for some optional
software. If you have any questions or if there is anything that
you'd like to explore, please ask.
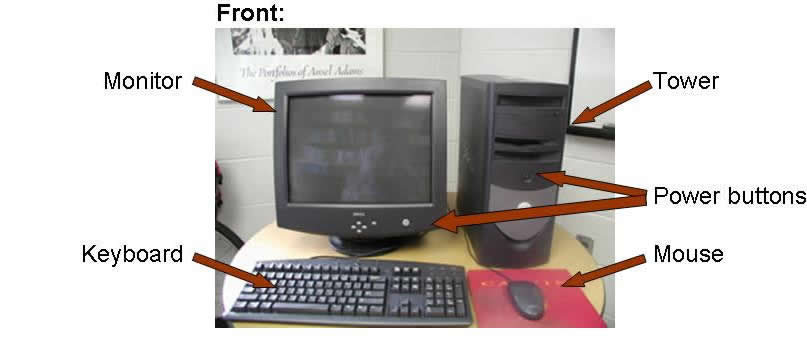
Setting up a Personal Computer
Before using a computer, you must interconnect the components
appropriately and plug them in to AC power. The basic components
of a computer include:
- Tower - This box contains the key hardware and
software components of the computer (see the list below).
- Video Monitor - This TV-like display device presents
information to the user visually.
- Keyboard - This input device allows the user to enter
text.
- Mouse - The input device allows the user to point to
and move objects around the workspace presented on the video
monitor.
If you don't already have a properly configured machine in your
lab, get the components and configure them as shown in the
following pictures. The first picture shows the front of a basic
PC and the second picture shows the rear of the same PC.
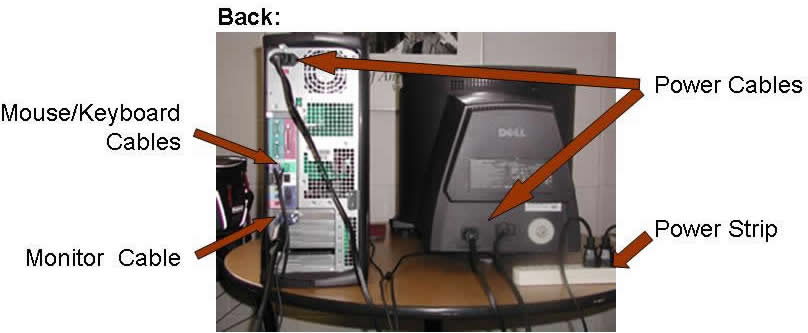
When you've got the system assembled, familiarize yourself with
the various components. Ask questions if anything isn't
clear.
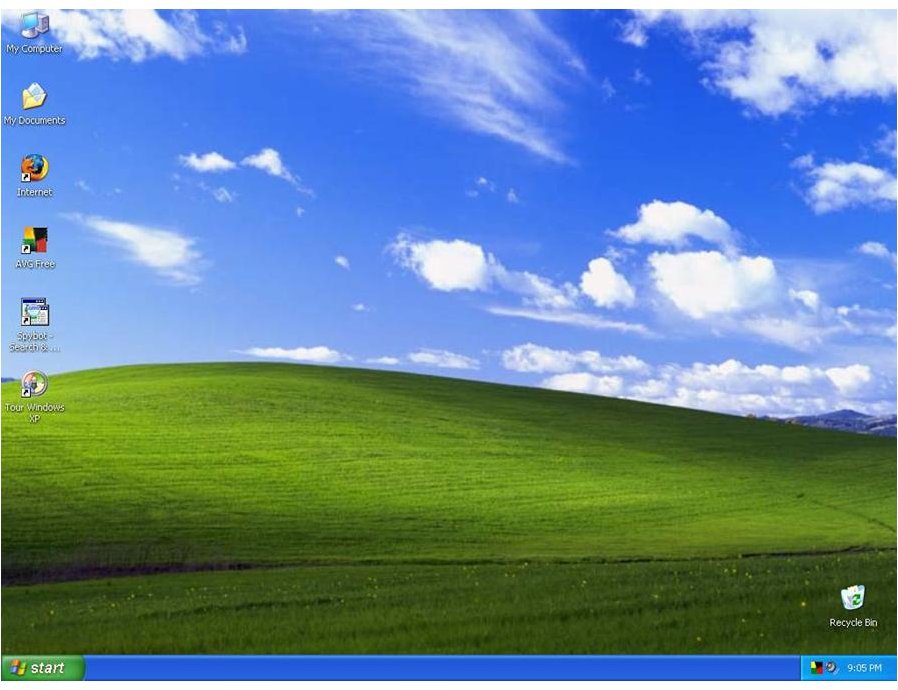
Starting up the PC Operating System
When the computer is connected properly, you can start it by
turning on the power-strip, the monitor and the tower. This will
cause the computer to automatically "boot" up the PC operating
system. If you are running the Microsoft Windows operating
system, your workspace will look something like the following:
It is important to know the characteristics of the system you
are using. PCs all tend to have the following basic hardware and
software components:
- Processor - This is the brain of the computer.
It executes all the work that your computer performs.
- Main Memory - This is your computer's
short-term memory. It keeps track of what is going on on
your computer at the moment. If you turn your computer off,
this information is lost.
- Hard Drive - This is your computer's long-term
memory. It stores the documents you are working on and the
programs you are using. This information is kept, even when you
turn off your computer.
- Operating System - This is the program that
controls all the PC system hardware. It performs the
operations that you, the user, request.
To find out the characteristics of your particular system, look
through the Windows "Control Panel" for "System Properties"
information. In Windows XP, you can do this as follows:
- Right-Click (i.e., click the right mouse button) on "My
Computer" (in the upper left corner of your workspace).
- Choose "Properties"
- Look through the "General" panel to find out the following
basic information on your PC system:
- your current operating system version
- your processor type and speed
- the amount of main memory your system has
- Now, go back and double-click (i.e., rapidly click the right
mouse button twice) on "My Computer" to find out the following
information on your system:
- the size of your hard-drive (by clicking the right mouse
button on "Local Disk (C:)" and choosing "Properties")
- a list of other storage devices your system supports
(e.g., a floppy drive - usually labeled A:, a CD drive, a
Zip drive)
The Windows operating system on your machine is a legal copy
with the appropriate 25-digit activation key listed on the
official Microsoft product sticker. You may use it on your
machine for as long as you'd like, but you are not allowed to let
anyone else copy it for use on another machine. You may buy and
install a new operating system at any time.
Break
We'll take a break here.
Securing your System
To start the second half, connect the network cable to your
computer. The this will connect it to the internet.
It's nice that there are so many computers connected to the
internet (including yours now!) - this provides you with more
useful information and services. However, it also makes it
possible for other people to access and hurt your computer in a
variety of ways. You should always actively protect your computer
from these attackers. Here is a list of the most common attacks
and how you can defend against them:
- Hacking - Malicious hackers can execute various exploits
trying to break into your computer. The best defense against
this is to have up-to-date software systems and to
turn on the Windows firewall.
- Viruses - Viruses are malicious programs that can
compromise your computer in a variety of ways (e.g., deleting
files, slowing the system down). The best defense against
viruses is use an anti-virus program (e.g., AVG from http://free.grisoft.com/).
- Spyware - Spyware programs can be planted on your
computer to monitor your activity (e.g., the credit card numbers
you type, the WWW sites you visit). The best defense against
this is to be careful about what websites you visit and to
periodically run anti-spyware programs (e.g., Spybot from
http://www.safer-networking.org/
and AdAware from http://www.lavasoftusa.com/).
To help defend against these problems, we've installed and
configured the software mentioned above on all of your machines.
This software is all open-source, and thus free for personal use.
However, you need to be involved in this defense effort as well.
The software will not work well unless you keep it up-to-date. As
an exercise, do this right now as follows:
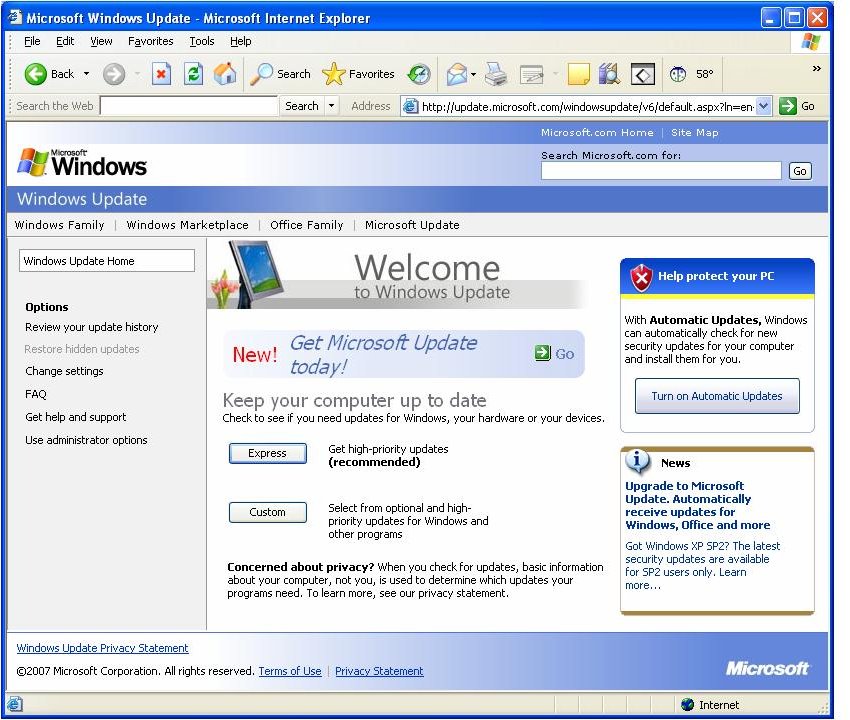
1. Update your operating system - This
is probably the most important task, and fortunately it's
relatively easy for Windows systems. Do the following:
- Use Microsoft Internet Explorer to visit http://windowsupdate.microsoft.com/.
- Click on "Scan for updates". This utility will then
scan your computer and list all the new system updates
that you should install.
- If you need any "critical" updates, the utility will
allow you to click on "Review and Install updates". The
utility may list other non-critical updates as well, but
they are optional.
- Microsoft operating systems generally have an
"auto-update" feature, which does these updates
automatically. Windows security settings are available by
going to "Start"-"Control Panel"-"Security Center"
|
 |
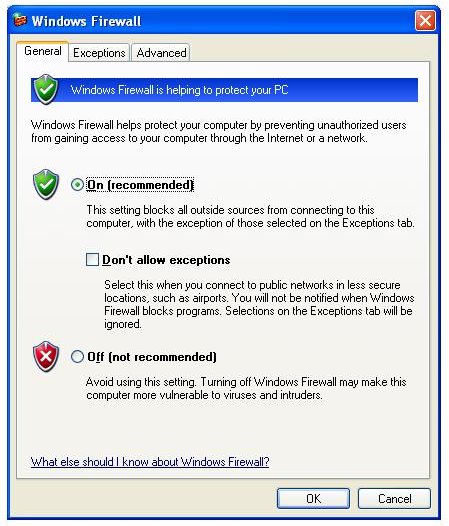
2. Check the Windows firewall - The Windows
firewall should already be activated.
You can check it out as follows:
- Click on "Start"-"Control Panel"-"Security Center".
In the "Windows Firewall" configuration box, ensure that
the Windows firewall is On (see the image to the right)
- The Windows firewall might also pop up confirmation windows
from time to time, which we'll discuss later as
appropriate.
- For now, just close the Windows firewall by clicking on the
"X" in the upper right of the control panel.
|
 |
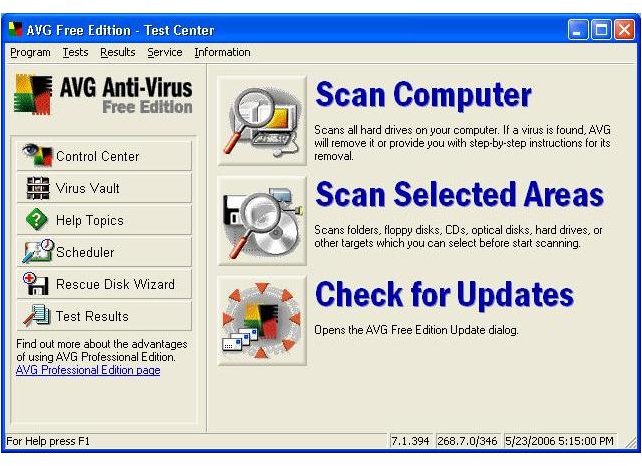
3. Update your virus definitions - AVG
is already running on your computer, defending against
viruses. However, hackers produce new viruses every day, so
you need to update your virus definitions frequently. Do this
as follows:
- Double-click on the AVG icon in the lower right of
your workspace.
- Click on "Check for Updates" and choose to download
the updates from the internet.
- If the Windows firewall pops up a warning box telling you that
AVG is trying to access the Internet, click "Allow".
The firewall is just alerting you that some program is going
on to the Internet - you can click Allow whenever you want
a program to get to the Internet.
- If there are new updates, tell AVG to install them.
- When this is done, close AVG by clicking on the "X" in
the upper right of the control panel.
|
 |
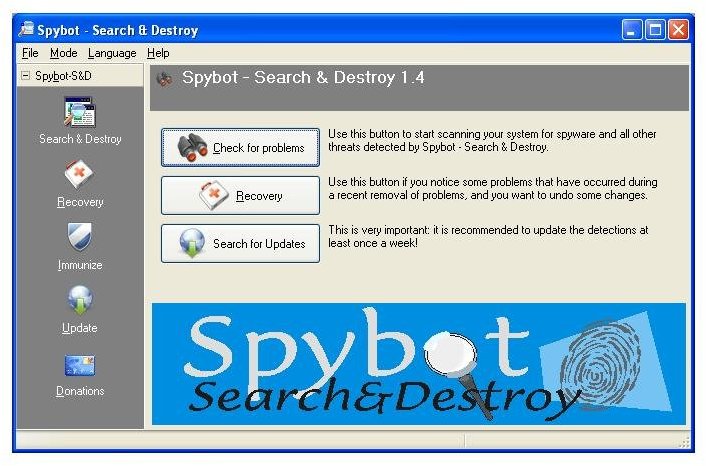
4. Update your spyware definitions and run
Spybot - Spybot is installed on
your machines, but it is not currently active so you need
to manually run it periodically to check for new spyware
definitions and to scan your system. Do this as follows:
- Double-click on "Spybot - Search & Destroy" on your
workspace. This starts up the control panel.
- Click "Search for Updates" to get available Spybot
upgrades. Tell the Windows firewall to "Allow"
Internet access if necessary.
- If there are updates, select them by clicking in the box
next to them, and then click "Download Updates".
- Run Spybot by clicking "Check for problems". This
will tell Spybot to scan your computer looking for
spyware; it may take some time to run.
- If Spybot finds anything, select the problems and
then click "Fix Selected Problems".
- When you are finished, choose "File"-"Exit".
|
|
The more you use the Internet, the more you need to perform
these tasks. Do them at least every month, if not weekly. They
can take some time over a slow modem, but it's probably worth
it.
Further Practice
Take this time to review the material we've done so far. If
you are new to personal computers, try one of the following:
- Go through on-line operating system tour (by
double-clicking on the appropriate desktop icon). This tour
requires sound, so you may to use headphones to hear what it
says. The most important information is in the "Computer
Essentials" tutorial.
- Try playing some of the Windows games (by clicking
"Start"-"All Programs"--"Games" and choosing a game
from the list).
There are a couple of things to note about working with
the Microsoft Windows operating system:
- When you are away from the computer for a while, the system
will automatically turn on the "screen saver" in order to
save energy and avoid wearing out the screen. The screen may be
blank, but this does not mean that the machine is turned off,
it's just put the monitor to sleep. You can wake it up by
moving the mouse.
- Occasionally, the system will "freeze up", that is stop
working no matter what you do. Windows is well-known for these
sorts of problems, and the only way to fix them is to reboot the
machine by typing Ctrl-Alt-Del
(simultaneously).
- To turn off the machine, choose "Start"-"Turn Off Computer"
and then select either "Turn Off" (to turn the machine
off) or "Restart" (to reboot the machine). If you use your
machine frequently, you may consider leaving it on all the time
to reduce the stress caused by warming the machine back up. If
you use it infrequently, you may want to turn it off each
time.
Feel free to ask any questions you may have.