Objectives
- To introduce class definitions.
Designing a Class’s External View
|
Classes, the cornerstone of object-oriented programming, allow
the programmer to add new types to the language. When designing a new
class, it's important to think about how the class objects will be
used, that is, to think from an external perspective.
In this lab, you will build a simple particle simulator that
looks like the one shown to the right. For this application, you will
need to create a Particle class that models particles moving and
colliding in a two-dimensional space. From the external perspective, a
programmer would expect these Particle objects to support the
following behaviors:
- Render - Display the particle on the display window;
- Movement - Move the particle object for each successive
frame based on a given velocity;
- Hits - Determine if one particle has hit another;
- Collide - Modify the velocity of a particle to model its
bouncing off another particle.
Before we begin to implement this Particle class, we’ll
consider this external API.
|
 |
Exercise 7.1
Write a driver program that declares, initializes and displays an
object of type Particle. Follow the approach used in class.
We suggest that you set the panel size to something large, say 400x400,
and the background color to black. You won't be able to run this program
yet because you haven’t implemented the Particle class, but you
will be forced to think about how to use the Particle class from an
external perspective. You may assume that Particle objects implement a
default constructor method and a display() method.
Save this driver program for use in the next exercise.
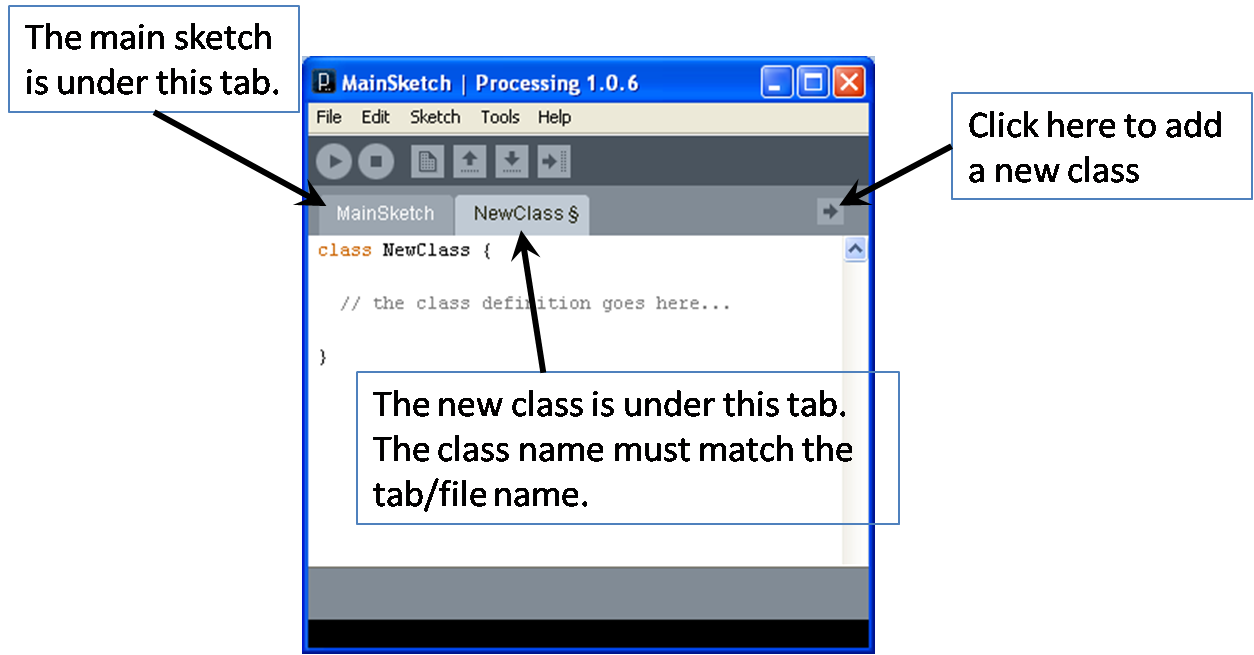
Implementing a Simple Class
The first step in implementing a class is to determine the
instance data that each class object must represent and to build a
method for constructing class objects. In the Processing IDE, you can
create a new class by adding a new tab to the workspace (see the arrow
on the far right of the tabs bar).
Exercise 7.2
Build a Particle class with the following features:
- Instance Variables - Implement instance variables for
the particle’s x-y coordinates, diameter and color. Follow the
naming convention discussed in class in which instance variables start
with
my (e.g., myX).
- Default Constructor - Implement a default constructor
method that initializes the instance variables to the following
hard-coded, default values: coordinates (15, 15); diameter 25; and
color white.
- Utility Method - Implement a
display()
method that draws the particle as a simple circle at the given x-y
coordinates, with the given diameter and color.
You should now be able to run your program and see a single
(stationary) particle with the default settings. When that is working,
modify your class to model a moving particle by doing the following:
- More Instance Variables - Add instance variables for
the x and y components of the particle’s velocity (
myVelocityX,
myVelocityY). Declare them with your other instance
variables and initialize them to some non-zero default values in your
default constructor.
- Mutator Method - Implement a
move()
method that changes the particle’s x-y coordinates according to
the two velocities you implemented above according to the following
algorithm:
Increment myX by myVelocityX.
Increment myY by myVelocityY.
Save this version of the program for use in the next exercise.
Mutator Methods
Classes provide methods that change their internal state, called
mutator methods. You will now implement a mechanism that
bounces particles off the “walls”.
Exercise 7.3
Add bouncing to the particle by modifying your move()
method so that it receives the width and height of the output panel from
its calling program and implements the following revised algorithm:
If the particle’s outer edge is beyond the left or right panel walls then
   Negate myVelocityX.
Increment myX by myVelocityX.
If the particle’s outer edge is above the panel’s ceiling or below its floor then
   Negate myVelocityY.
Increment myY by myVelocityY.
Save this version of your program for use in the next exercise.
Overloading the Constructor
Processing allows more than method to have the same name,
provided that the method signature (i.e., the return type and the
types/order of the parameters) are different. This is called overloading
the method. This is commonly done with constructor methods.
In this section, you will implement a second, explicit-value
constructor method that allows the calling program to specify the
locations of the particles.
Exercise 7.4
Make the following modifications to your program:
- Explicit-Value Constructor - Add a new explicit-value
constructor that receives values for x, y, diameter, velocityX,
velocityY and color from its calling program. This method verifies that
these values make sense and then stores them in it instance variables.
Given that any values for the coordinates, velocities or color could
make sense, the only parameter that we need to check is the diameter,
which should not be negative. If your constructor receives a negative
diameter, have it print an error message and stop the driver (i.e.,
using
stop()). This is a rather draconian approach, which
we will improve upon later in the course. Test this by trying to
construct a particle with an invalid value for the diameter. When this works,
be sure to comment out the offending declaration/definition.
- Arrays - When you have the single particle case
working properly, modify the driver to create an array of particle
objects each set with random x-y coordinates, diameters, x-y
velocities, and colors. Where appropriate, set reasonable limits on the
random values.
Save this version of the program for use in the next exercise.
Accessor Methods
Accessor methods allow other programmers to access the values of
a class’s private data attributes.
Exercise 7.5
Add accessor methods to your Particle class for the x coordinate,
the y coordinate and the diameter. To verify that they work, add three
temporary println() statements to your main draw()
method that print out the x and the y coordinates and the diameter for
each particle on each animation frame.
When you have this working properly, take the temporary println()
statements back out and save the program.
Object Interaction
In some cases, Particle objects must interact with one another.
For example, if we want an object to be able to determine if it has
collided with another object, it will need to be able to access (and
perhaps change) not only its own x-y coordinates and diameter, but also
those values for other objects. Accessor (and mutator) methods provide
this capability.
Implementing this behavior in a class method can be confusing
because the method will have receive a Particle object from its calling
program (e.g., named other) and then work with its own
instance variables (e.g., myX and myY) and
those of the other object (e.g., other.getX() and other.getY()).
Exercise 7.6 (Extra Credit)
Add collision detection to your model as follows:
- A Utility Method - Add a
hits() method
to your Particle class that receives a Particle object (other)
and determines if the current object has collided with other.
Use the following algorithm:
If the distance from (myX, myY) to (other.getX(), other.getY()) is less than myDiameter/2 + other.getDiameter()/2:
    Return true.
Otherwise
    Return false.
- Another Mutator Method - Add a
collide()
method to your Particle class that receives a Particle object (other)
and reflects the particle’s velocity using the following constant
definition and method:
private final float DAMPENING_FACTOR = 0.80;

// Collision algorithm based on K. Terzidis, Algorithms for Visual Design
public void collide(Particle other) {
  float angle = atan2(other.getY() - myY, other.getX() - myX);
  float otherX = myX + cos(angle) * (myDiameter/2 + other.getDiameter()/2);
  float otherY = myY + sin(angle) * (myDiameter/2 + other.getDiameter()/2);
  float ax = (otherX - other.getX());
  float ay = (otherY - other.getY());
  myVelocityX = (myVelocityX - ax) * DAMPENING_FACTOR;
  myVelocityY = (myVelocityY - ay) * DAMPENING_FACTOR;
}
- Finally, modify the driver program’s
draw()
method to check all pairs of objects for collisions on each frame
according to the following algorithm:
For each particle (i)
   Move the particle.
   Display the particle.
   For each particle (j)
      If (i != j) and (particle i hits particle j) then
         Ask particle i to handle a collision with particle j.
You should have already written the first three lines of the
algorithm, you must now implement the inner for loop.
Save this program.
Checking In
Submit all the code and supporting files for the exercises in
this lab.