Manipulating images is common task and there are a large number of image editing tools available, including: Photoshop, Fireworks, and The Gimp (the Gnu Image Manipulation Package is an open source alternative to the closed and more expensive commercial packages). Our simple image processor will not approach these tools in complexity, but it will work in basically the same way they do. Here’s how it will look:
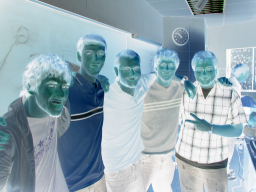
This GUI displays a bitmap image and provides manipulation tools through a keypress-based interface. This isn’t the greatest of interface designs, but it will serve our purposes for the moment. Here are examples of some of these features:
the image brightened by a set amount (the inverse of dim) the image dimmed by a set amount (the inverse of bright) the image mirrored horizontally the image mirrored vertically the negative of the image the image shifted 200 pixels to the right
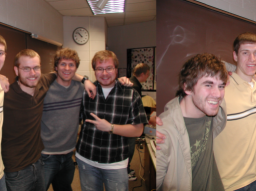
You’ll also be able to use the manipulations (and others) in combinations to create a variety of effects, such as the following:
Before: After:
In this lab, you’ll start with a partially implemented program called ChimpLite.
Make a copy of the ChimpLite system (see also the lab code distribution directory) and then do the following:
Add your name(s) and the date as a new version. Because you are modifying code that someone else has written, you should leave the original author and version information in the comments and add yours.
Make sure that you can run the code. The “Refresh” (key code 'f') and “Dim” (key code 'd') options should work properly if you press the appropriate key on the keyboard while the system is running. If you’d like to work with a different image, feel free to download one now. As you can see in the code, the system loads an image, determines the image’s width and height, and then sizes the Processing output panel.
When this lab asks you to add a new image manipulation feature,
you will mimic what the code already does for its existing features. In
particular, you should modify keyPressed() by adding one
more appropriate branch to the multi-branch selection statement that
handles the key presses (see the comment Add new key press
response code here...). Each new branch calls a different image
manipulation effect method and you should choose an appropriate
character to initiate the given effect.
dim() method manipulates pixel
color values. It uses a double-nested for loop to visit each pixel in
the image, the get(x, y) method to return the color value
of the pixel at position (x,y), and the set(x, y,
newColor) method to reset the pixel at position (x,y) to a new
manipulated color value. It uses the color(r, g, b) method
to create a new color object with the given red, green and blue
intensities.You will only produce one large program in this lab, so you don’t need to create separate directories for each exercise.
You can also rename the chimpLite program to Chimp if you would
like; for this you must rename both the .pde file and the
directory.
In this section, you’ll implement a set of new image manipulation effects.
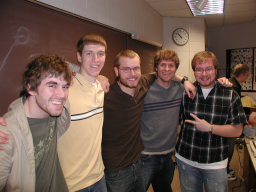
The brightening and dimming effects modify the level of intensity of all three color attributes of all pixels in the image in a uniform manner. Increasing the intensity values brightens the image, that is it makes the image lighter or more washed out. Decreasing the intensity values has the opposite effect. As a reminder, here is what the effect does:
the original image: the image brightened by a set amount
(the inverse of dim):the image dimmed by a set amount
(the inverse of bright):
dim() implements the dimming effect. Study this
implementation and then do the following exercise:
Create a brighten effect for Chimp that acts as the inverse of the Brighten effect. You’ll have to do the following things:
brighten() method to implement the
effect. This method will be similar to dim().One “quick and dirty” approach to implementing the
dim effect is to copy the brighten effect and change the +
10 to - 10. Perhaps you used this approach. It works but
you may have noticed that you simply copied most the code, creating two
methods that are very very similar. In fact, they are too similar.
Copied code is usually a indicator of bad design. A better design would
“factor out” the common elements of these two similar
methods and modularize them into a single method that uses parameters to
differentiate the different behaviors.
The process of redesigning and reimplementing code without changing its behavior is called refactoring.
Refactor the dim and brighten methods to use a common changeBrightness(int)
method. Do this as follows:
changeBrightness(int) method that
receives an integer, and modifies the pixel intensity of all the pixels
in the image by that amount. This code will be almost identical to the
original dim() method, except that it won’t just
subtract 10, it will add whatever value is passed in the parameter (a
positive number for brighten and a negative number of dim).changeBrightness(int) with the arguments
of -10 and +10 respectively.Work with your code until you have Dim and Bright both working as they did before.
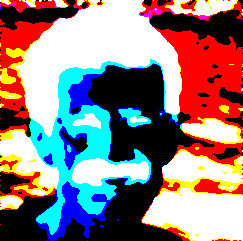
The negative effect produces a negative image of the original. A
negative image is an image in which all the color values of all the
pixels have their intensity values inverted. For example, you can invert
the red intensity value of a color object c using the
expression 255 - red(c). As a reminder, here is what the
effect does:
the original image: the negative of the image
Create a Negative effect for Chimp in a manner similar to the way in which you created the Dim effect.
Flip effects mirror the images either a horizontally or vertically. As a reminder, here is what these effects do:
the original image: the image mirrored horizontally the image mirrored vertically
Chimp already has a method for the Flip-Horizontal effect. Study this implementation and then do the following exercise:
Create a Flip-Vertical effect for Chimp.
The shift effect “slides” the image to the left, wrapping it around on itself. As a reminder, here is what the effect does:
the original image: the image shifted 200 pixels to the left
One way to implement the shift effect is to write something similar to the flip effects. Unfortunately, those solutions assumed that the flipping could be done by simply swapping pixels on either side of a mirroring line, which only really works when the mirroring line bisects the image. Flipping (or shifting) an image with respect to a non-bisecting line would be harder to do that way. In this exercise, we’ll add a couple of index manipulation tricks to help make this task easier:
Create a Shift-Left effect that “wraps” the image around on itself by 100 pixels. The algorithm for doing this generally follows the algorithms used in the earlier methods, but has some differences:
Note:
Because copying an image’s pixels to itself causes you to
overwrite some pixels and thus mess up your shift operation, you must
start by making a copy of the original PImage
object (i.e., theImage). Note that because the image is a
reference object, you can’t just say: PImage
imageCopy = theImage; because this would simply copy the reference to the
image object rather than copying the image itself. Instead, use the copyImage()
method provided in the code:
PImage imageCopy = copyImage(theImage);
While it might seem easy to simply get the pixel 100 spaces to
the right, this will cause problems when you start moving beyond the
right edge of the image (i.e., when i+100 moves beyond the
edge of the image). Instead, use the modulus operator to compute the x
coordinate as follows:
(i + 100) % imageWidth
The % operator automatically wraps an out-of-bounds
array index back around to the front of the image.
Keep these notes in mind; they are useful for some of the homework exercises.
Submit all the code and supporting files for the exercises in this lab.