Extend the lab exercise to do one of the following image processing effects
The Blur effect “softens” the color boundaries through out the image. Here is an example of what the effect looks like after the “Blur” button has been pressed a few times:
the original image: the blurred image: 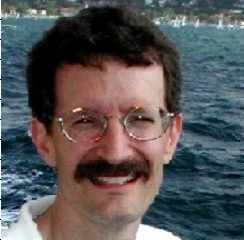

To create this effect, you average the color intensity values for a pixel based on the color values of all its neighboring pixels. For example, if your original image had a section of Pixels whose red components have the following intensity values:
116 119 65 85 14 31 177 5 55 you should, in your blurred image, set the new value of the red component for the center Pixel to 74, the average of all of the pixels in the 3x3 square. Note that because your blurring operation changes the pixel color values in your image, you will need to use a copy of the image as the source of the original pixel color values.
The Polarize effect sets the color values of each pixel to extreme limits. Here is an example of what the effect looks like:
the original image: the polarized image: 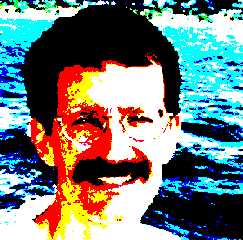
Polarize sets each pixel color intensity value to either 255 or 0 based on whether the value is greater or less than the average value for that color across the whole image. You must first find the three average pixel values in the image, one for each color, and then set each Pixel’s R, B, G value to either 0 or 255 based on its relation to the average values.
The GrayScale effect removes the RGB color differentiation in the image. Here is an example of what the effect looks like:
the original image: the image in gray-scale: 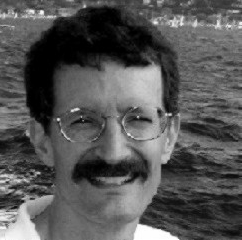
This effect is implemented by setting the color values for a pixel to the average of the individual red, green, and blue for that pixel.
The Shift-Left effect from the lab exercise shifts the entire image to the left by 100 pixels. Modify that code in two ways: Provide a matching Shift-Down method; and refactor your code to support shift factors (in both directions) other than 100 pixels. Here is an example of what the effect looks like for a combined shift-left and shift-up effect:
the original image: the image shifted left and up: 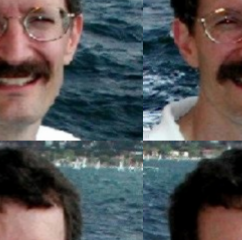
For this effect, you can hard-code two shift factors of 100 pixels, but your shifting methods should support any shift factor.
The Zoom effect magnifies part of the image. Here is an example of what the effect looks like:
the original image: the zoomed image: 
In this effect, the image stays the same size, but the pixels from the upper left portion of the original are quadrupled in size, that is, each of the pixels in the upper left take up 4 pixels in the new image rather than just 1. You’ll notice that the zoomed image has a lower resolution that the original.
Build a chooser of one of the following types: (1) a color chooser with RBG boxes, an intensity slider for each box, and a final color pane; (2) an image chooser with 4 image choices and a final pane; or (3) an audio chooser with 4 song choices.
Build a pong game or a single-paddle bounce game (with sound).