.
.Your instructor may choose to divide you into programming teams of two. One approach for
working in such teams is called Pair
Programming.
Regardless of whether you work in teams in the lab, you must always do your prelab questions individually.
Based on the text and lecture examples, do the following exercise.
|
You create several sketches/programs in these lab exercises, so it is a good idea to create
a
|
 |
|
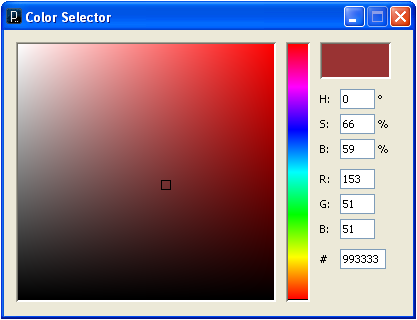
The Processing environment provides a “Color Selector” tool that makes finding the right color a bit easier. This tool, shown here, allows you to either choose a color from the color palette or to directly specify the RGB values. Note that it also supports HSB (Hue-Saturation-Brightness), another color encoding scheme. |
|
|
Create a new upgraded smiley face similar to the one shown here (call it For more shape methods, see the Processing reference manual (http://processing.org/reference/ |
 |
|
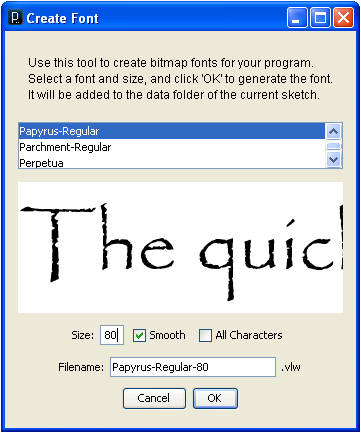
Processing can create, load and render text fonts, but it does not create them automatically. You need to create the fonts ahead of time using the “Create Font” tool. This tool, shown here, allows you to select the font face (e.g., “Papyrus”), its weight (e.g., “Regular”) and its size (e.g., “80” points). Processing automatically creates the font definition files and stores them in the |
|
Add a text annotation to your smiley face, such as the one shown here. You may choose the font,
the size and the message. Save this new version as a separate sketch (named Ex23).
|
 |
Processing can load and display predefined image files. Processing currently supports GIF, JPG, TGA and PNG formats.
When your code references an image file, or any other sort of supporting file, Processing
will look in the data sub-directory discussed in the previous section or in the
directory that contains the program file. Thus, you should load supporting files in one of those two
places.
|
Download a pre-defined smiley face image from the web and display it using a Processing
program (named Consider the question of why you would go to the trouble of using Processing code to construct a smiley face image rather than just downloading an image or creating one with a WYSIWYG (What You See Is What You Get) tool like MacPaint. Write a one-paragraph response to this question (saved as comments in your code). |
 |
Submit all the code and supporting files (including your paragraph response from the last question) for all the exercises in this lab.
If you work in a team of two, be sure to: